RECIPES — RACHEL WALDER

THE TINIEST THAI

Homemade limoncello

I love yellow.  I love sunshine.  I love lemons. 

And yes, I love limoncello, that glorious Italian digestif that transports me to the lemon groves of Sicily (where, actually I haven't yet ever been, although I definitely plan to and it's where my friend Valentina is from).

OK then, so it transports me to somewhere sunny (since I don't know Sicily) where I can smell citrus and trees and hot earth and salty breezes, and feel the sun soaking into my skin like pure life force. Somewhere like that.

Yet it's winter, in fact the first frost of winter today.  And that, dear friends, is the power of limoncello. 

It's delicious, it's bottled sunshine - and it's easy to make.  It needs three weeks from putting the vodka and lemon peel together until it's ready-to-drink, so if we start it now, it'll be ready in time for some Christmas parties and for giving as (very welcome) gifts.
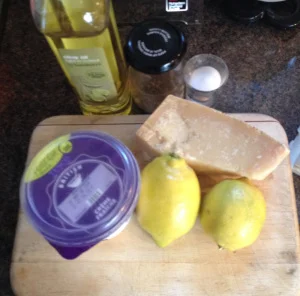
You'll need:

 
Rachel Redlaw limoncello
 

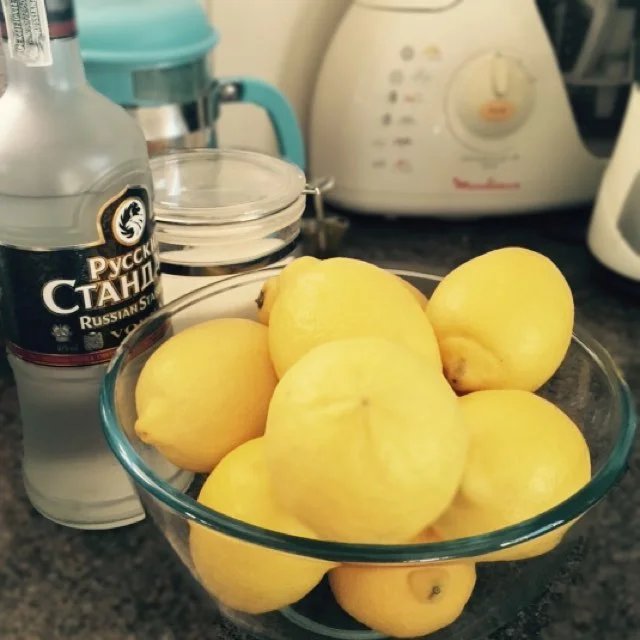
6-8 (depending on size and how you feel that day) unwaxed, organic lemons

I am specifiying unwaxed and organic as due to the amount of time the peel steeps, any nasties in it will also transfer to your drink.  To be entirely honest, I once made it with the only lemons available and that definitely weren't organic, and I'm still here to tell the tale, but it's just common sense to get the most natural, beautiful ones you can find).

A bottle of vodka

Sugar for the sugar syrup - but we don't need that until two weeks' time, so I'll come back and add that bit and update the photos then.

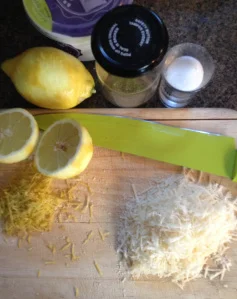
For now, all you do is start by washing the lemons, rinsing them and drying them.

 
Rachel Redlaw limoncello lemons
 

Then using a vegetable peeler or small sharp knife (or both) peel off the rind as very very thinly as you can.  The white pith has a bitter flavour and whilst it's going to be impossible not to have any of it at all (so don't obsess), it is important to be as careful about avoiding it as you can.

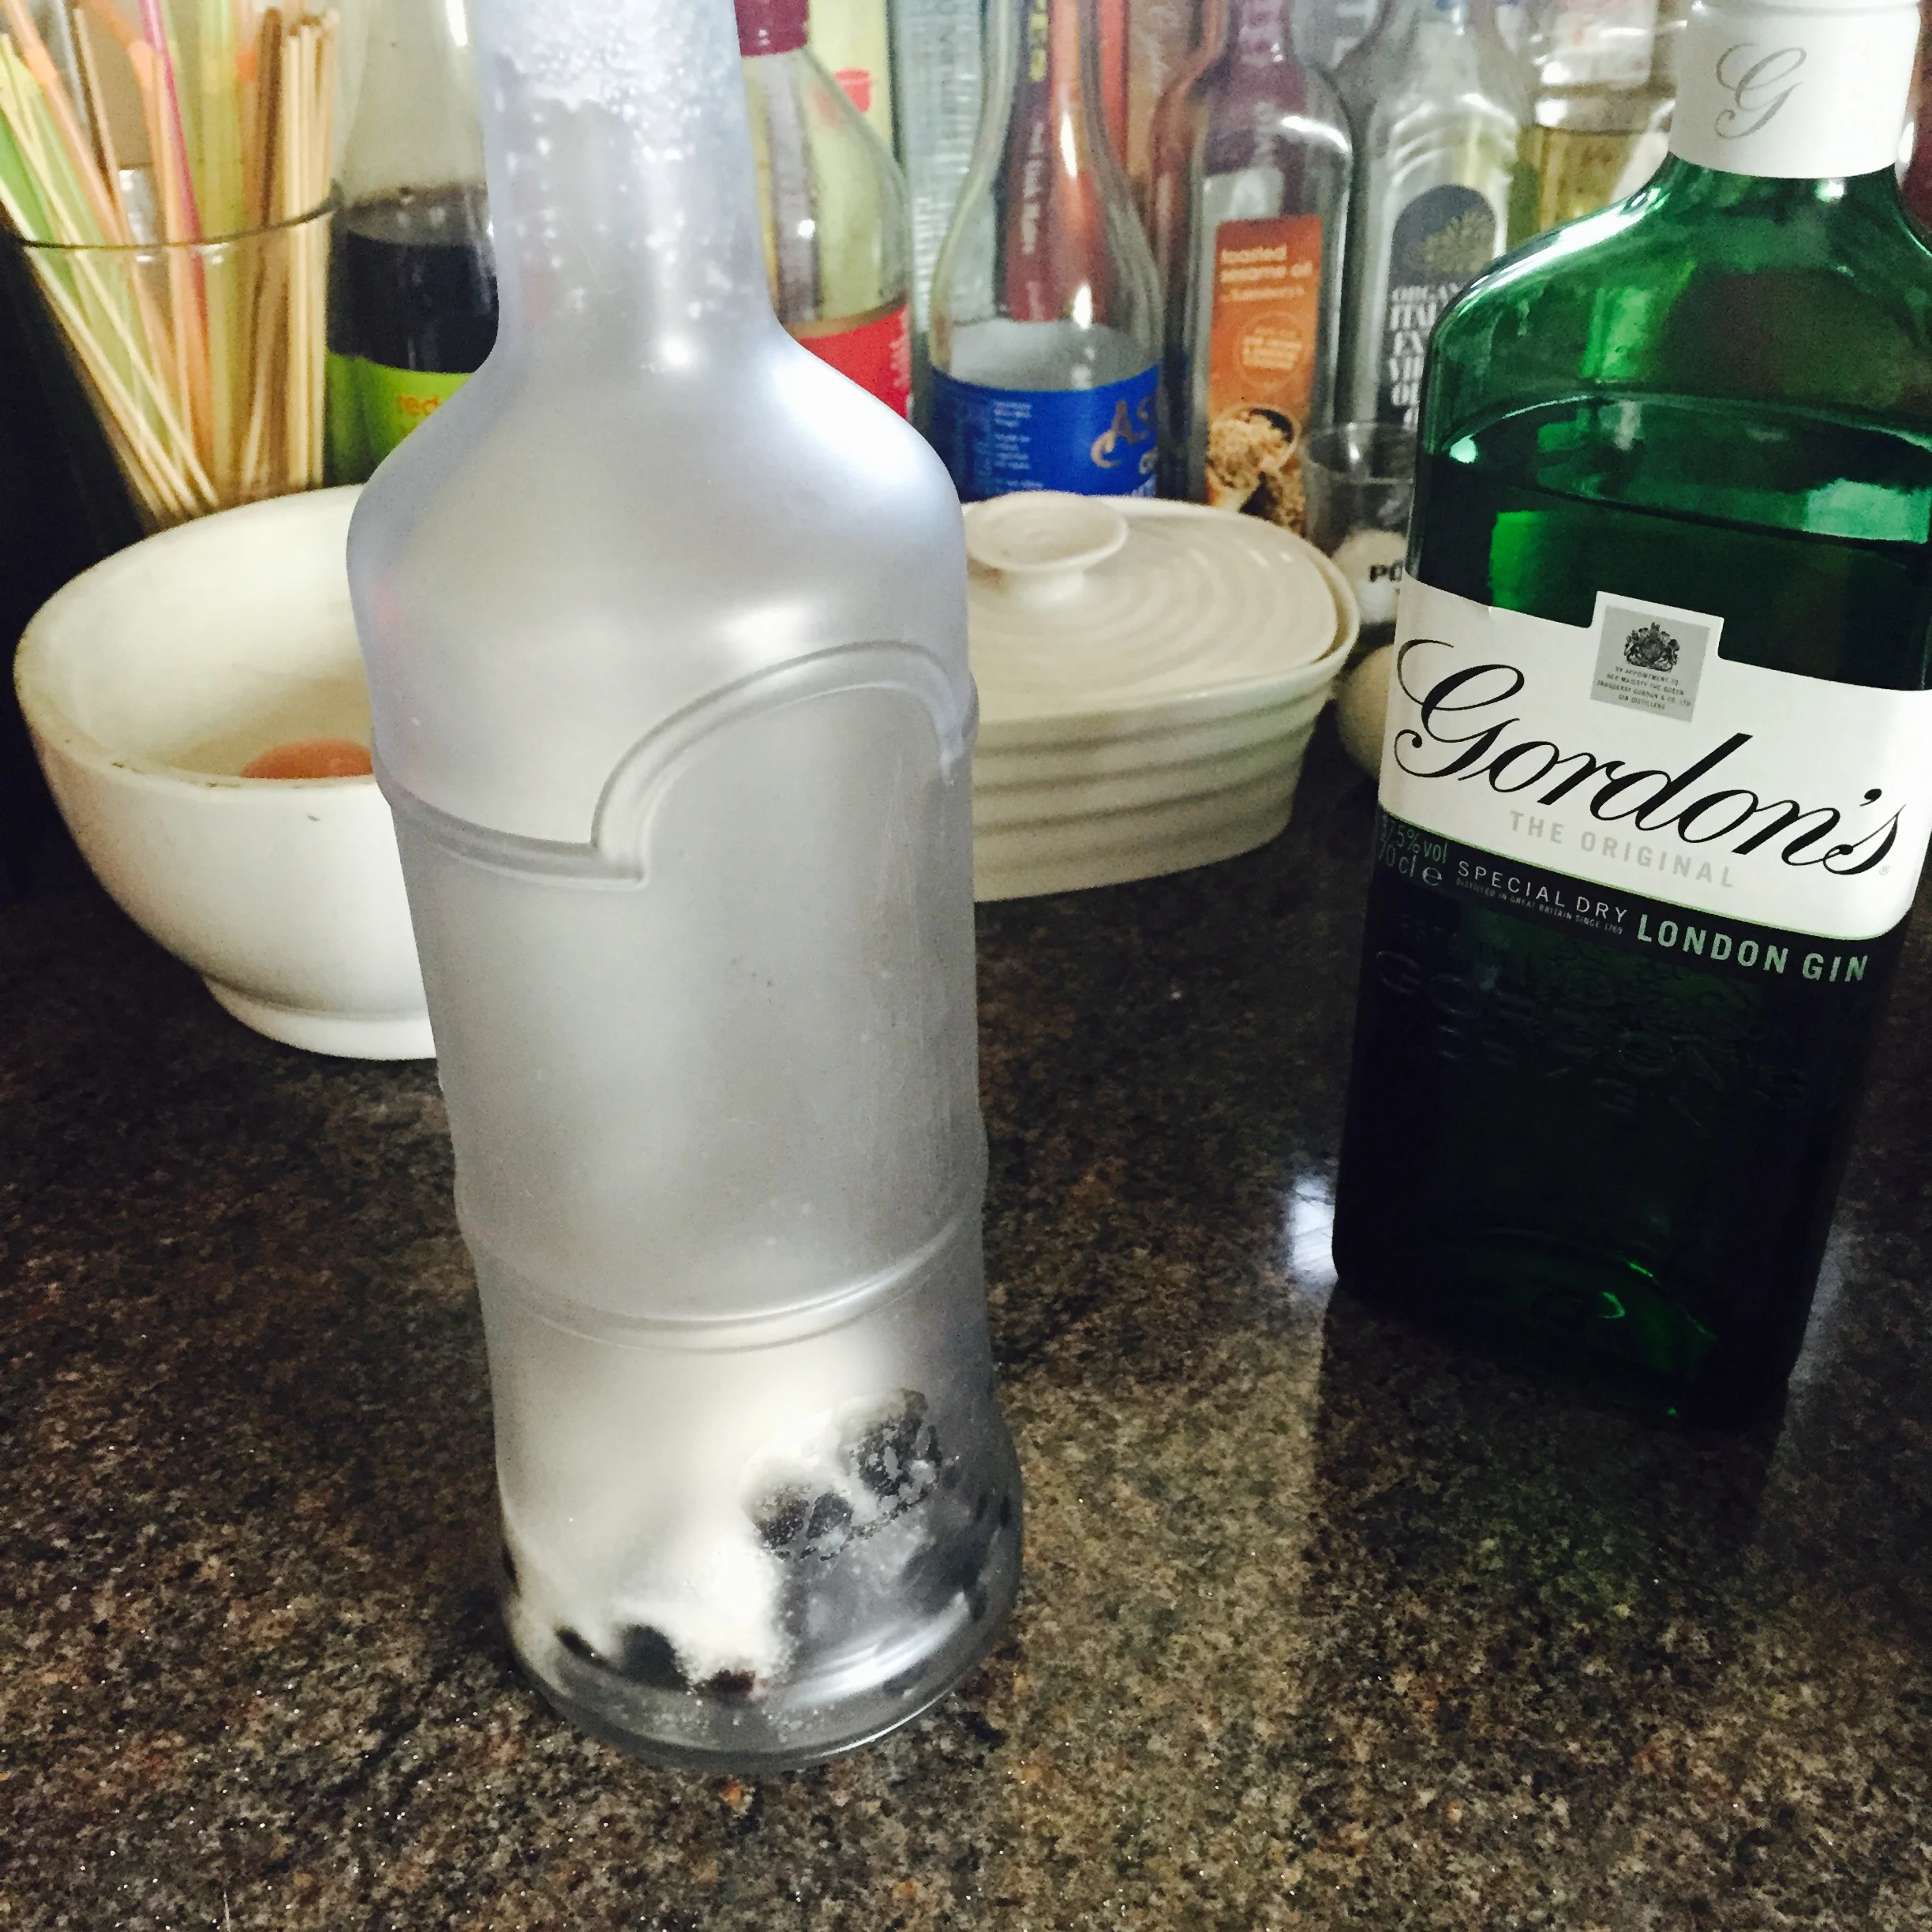
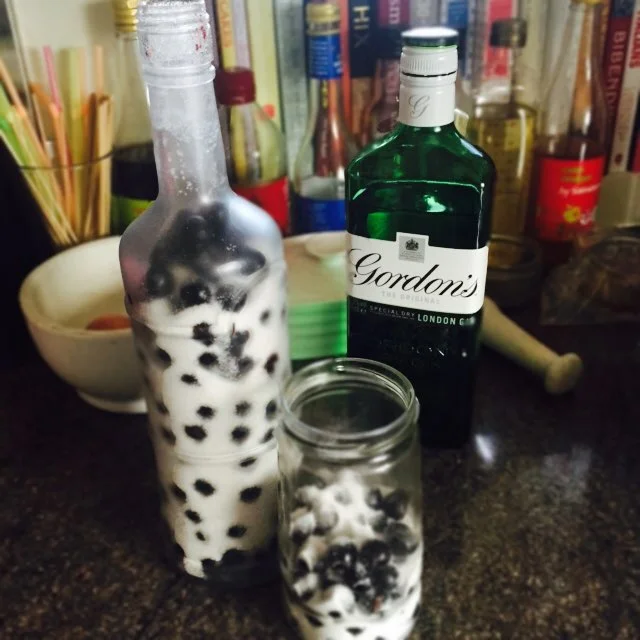
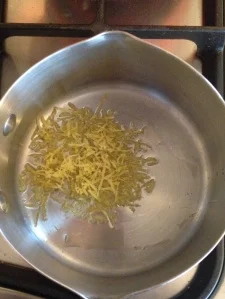
So, very finely peel 6-8 lemons - I did seven - and pop the bits of peel into a jar or bottle.

Rachel Redlaw limoncello

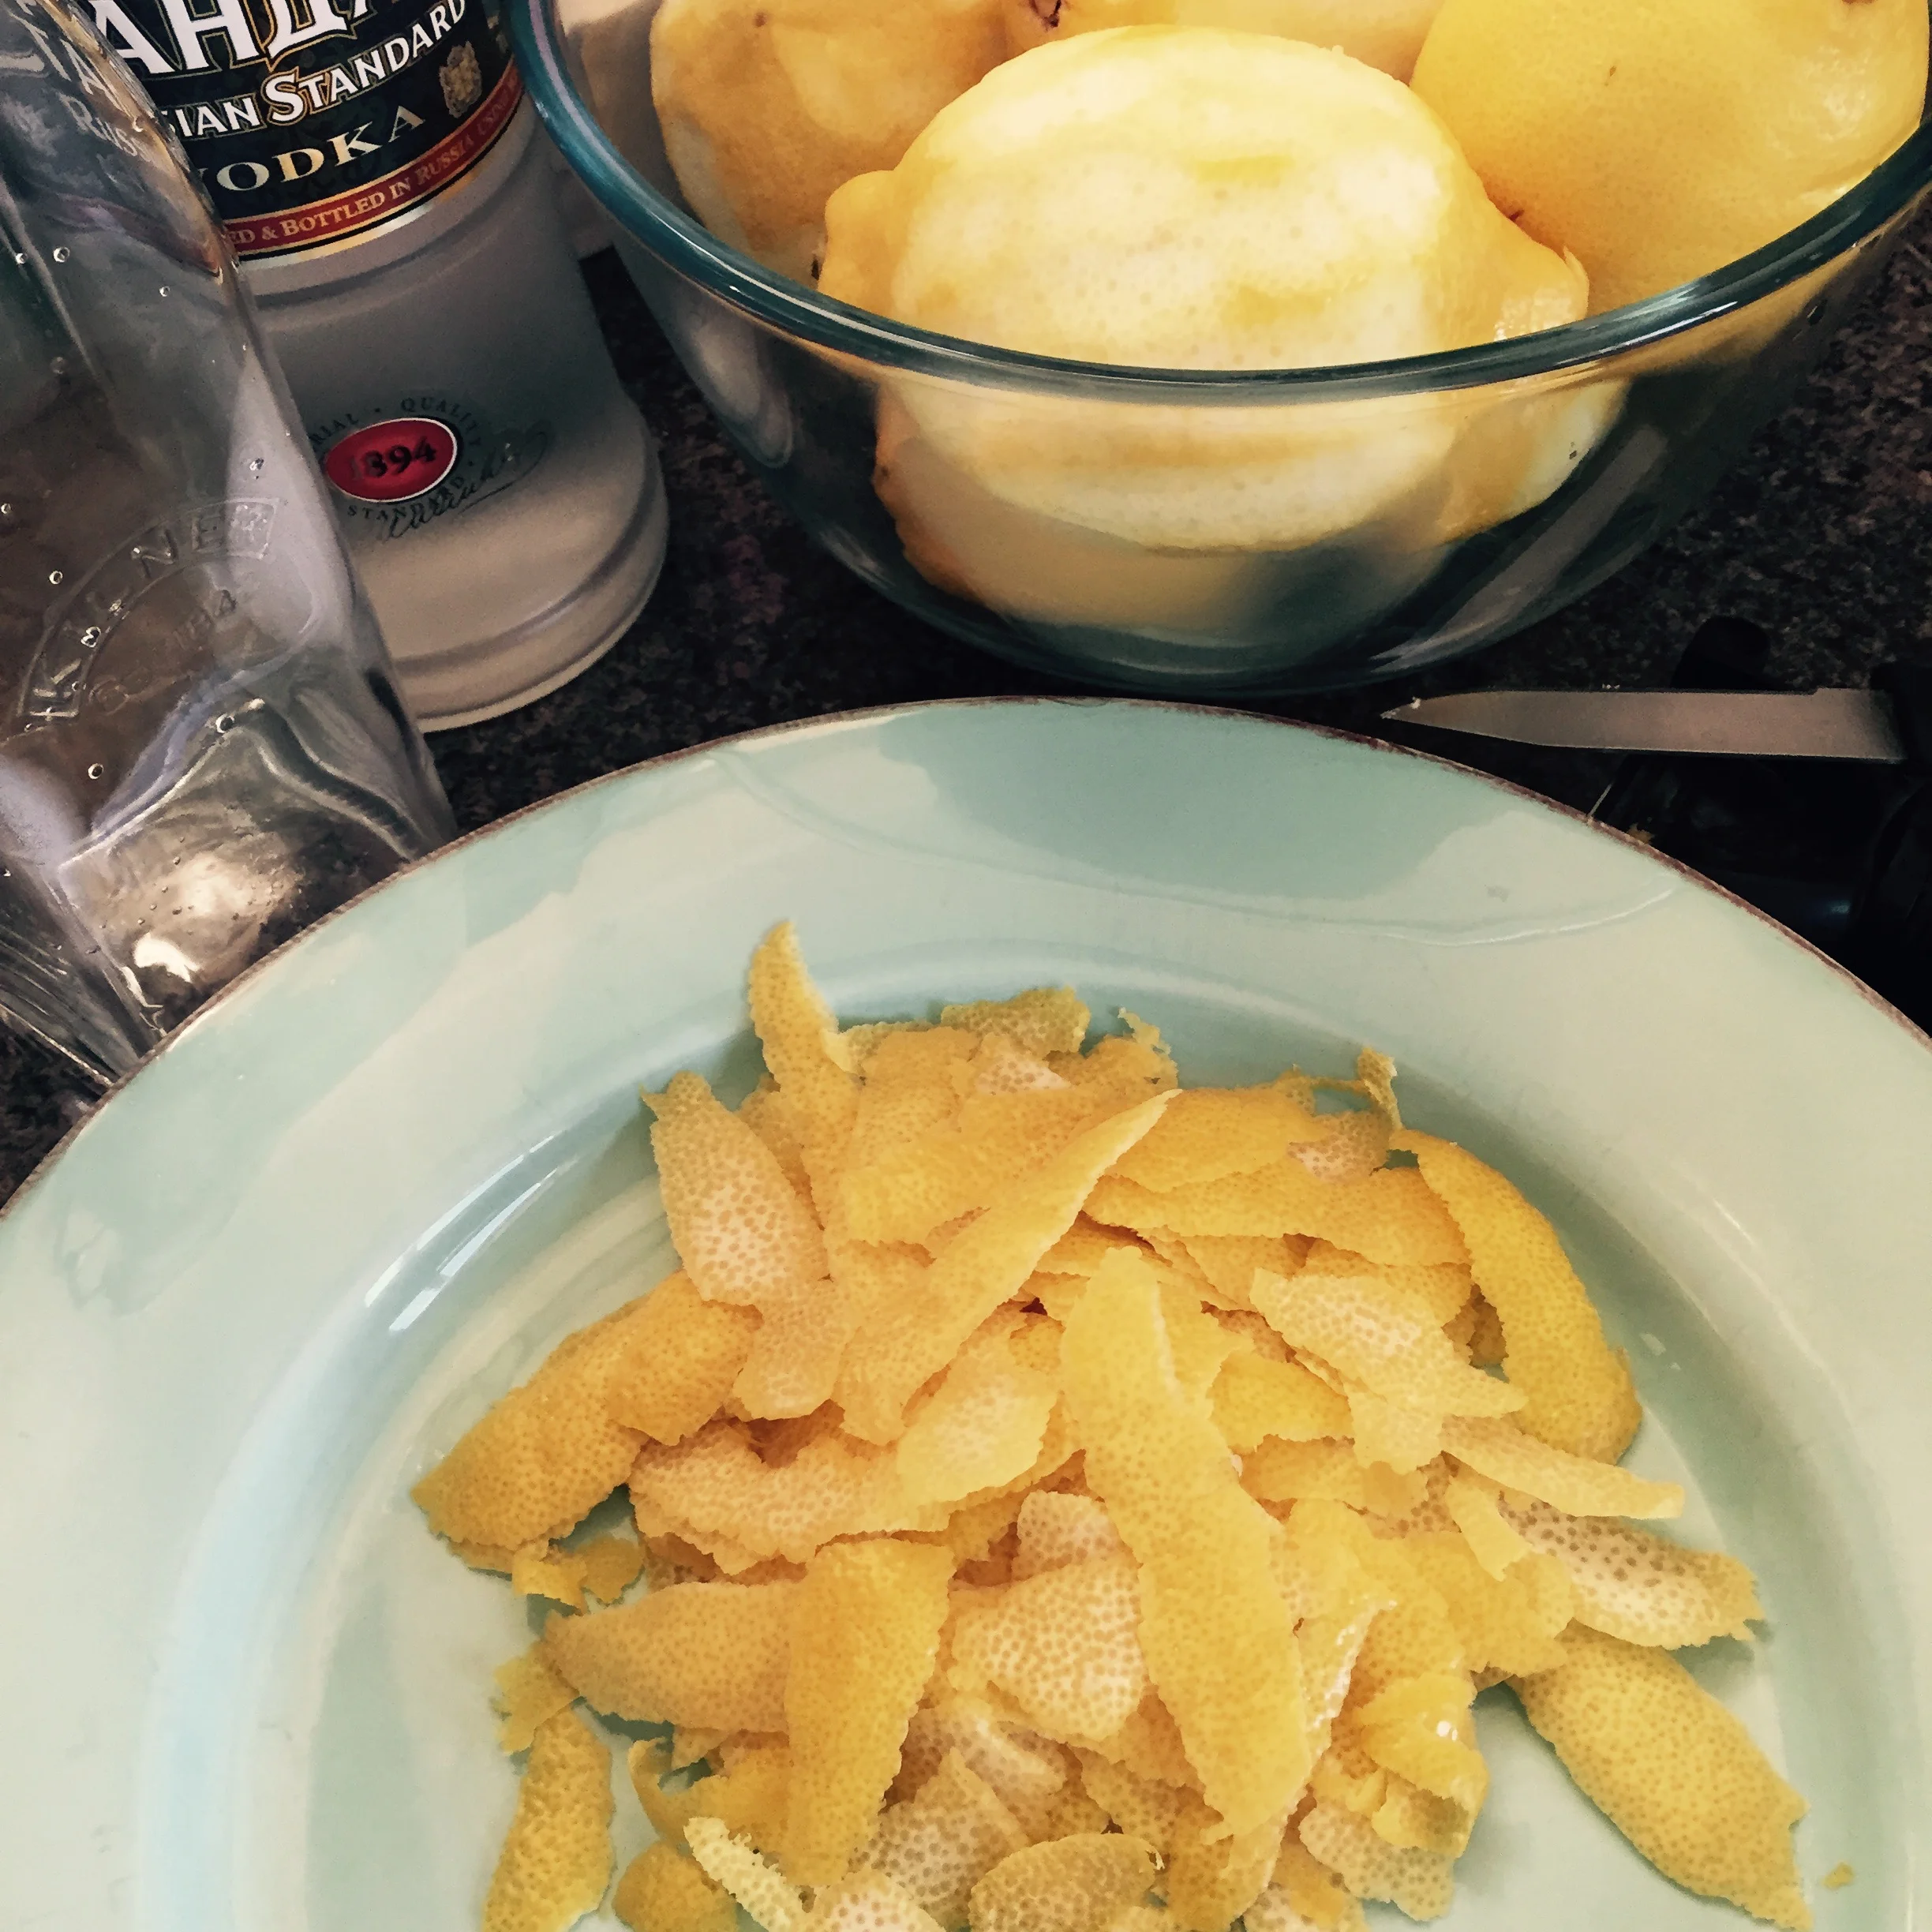
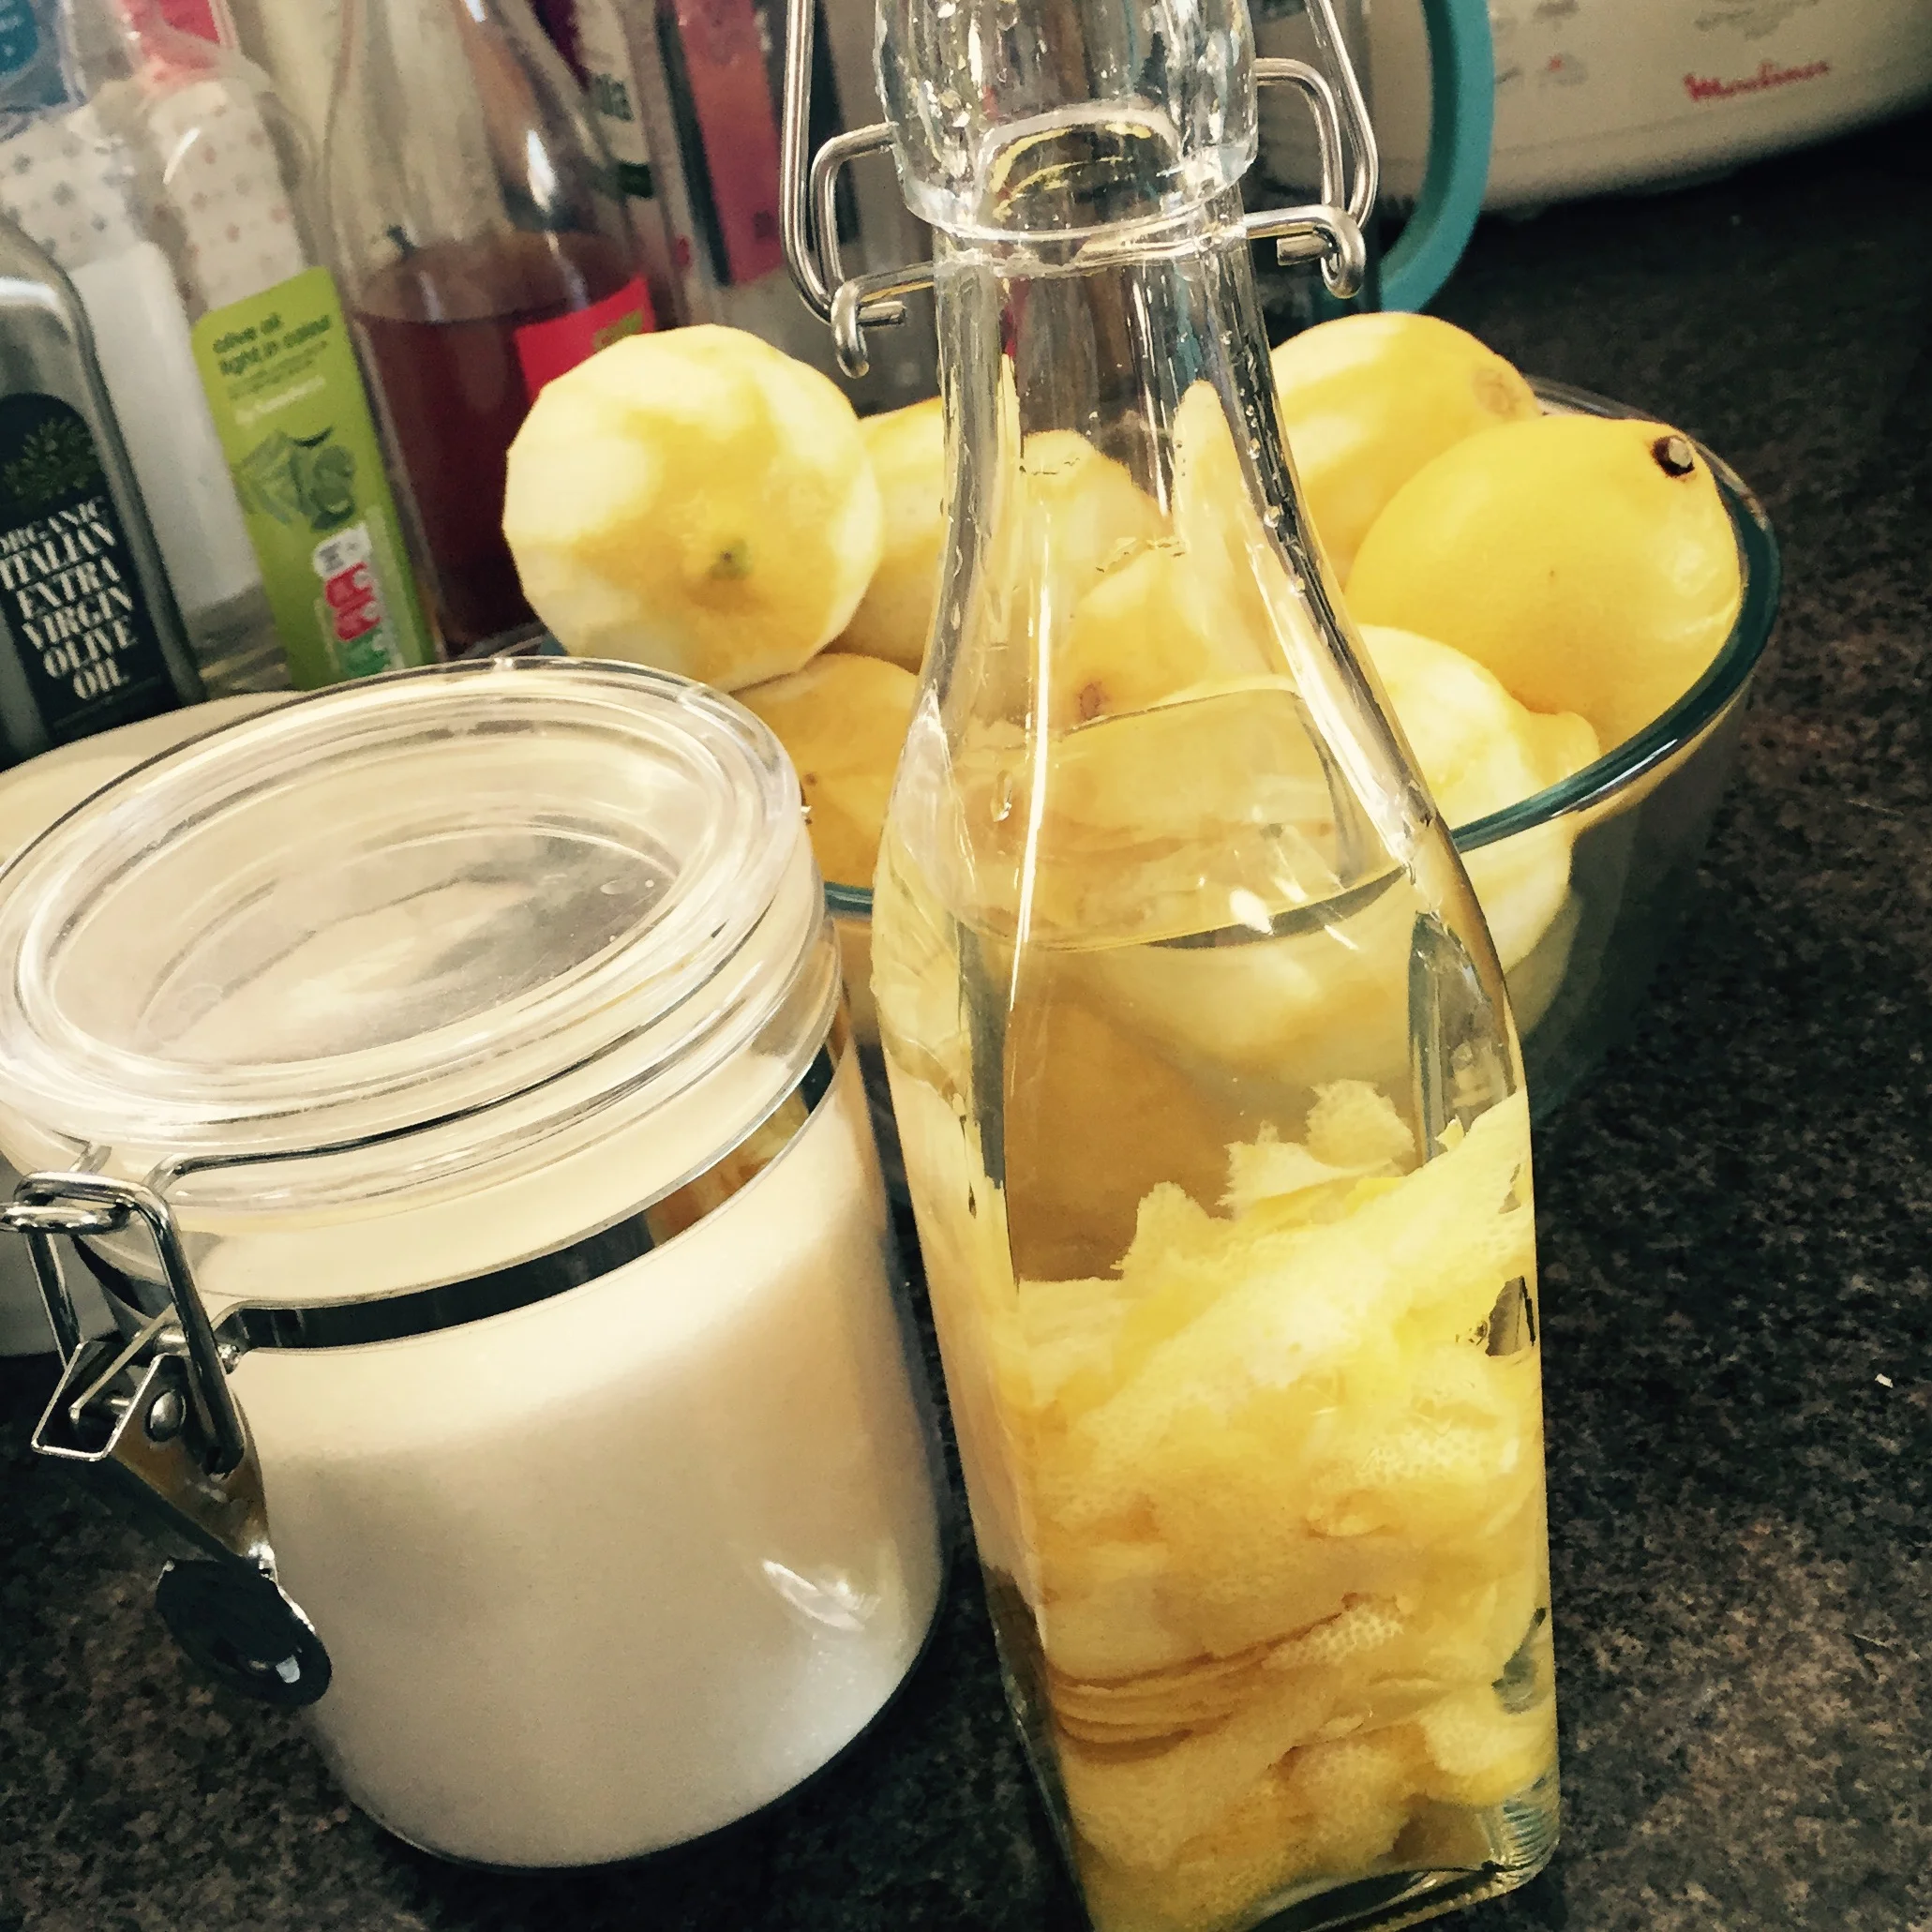
Top almost to the top with vodka (we need room for a cup of sugar syrup in a couple of weeks), seal tightly and put away somewhere cool and dark for a couple of weeks or so.

Update: three weeks' later ...  although two weeks would have been enough. 

OK, so right at the very last stage I went a bit loopy and made this much much harder for myself than need be!

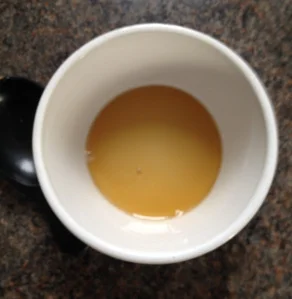
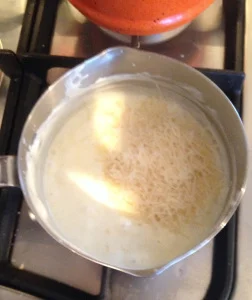
What SHOULD have happened is that I should have made a couple of cups of sugar syrup.  Two cups sugar and two cups water, brought together very slowly in a saucepan, simmered for 2-3 minutes and then left to cool.

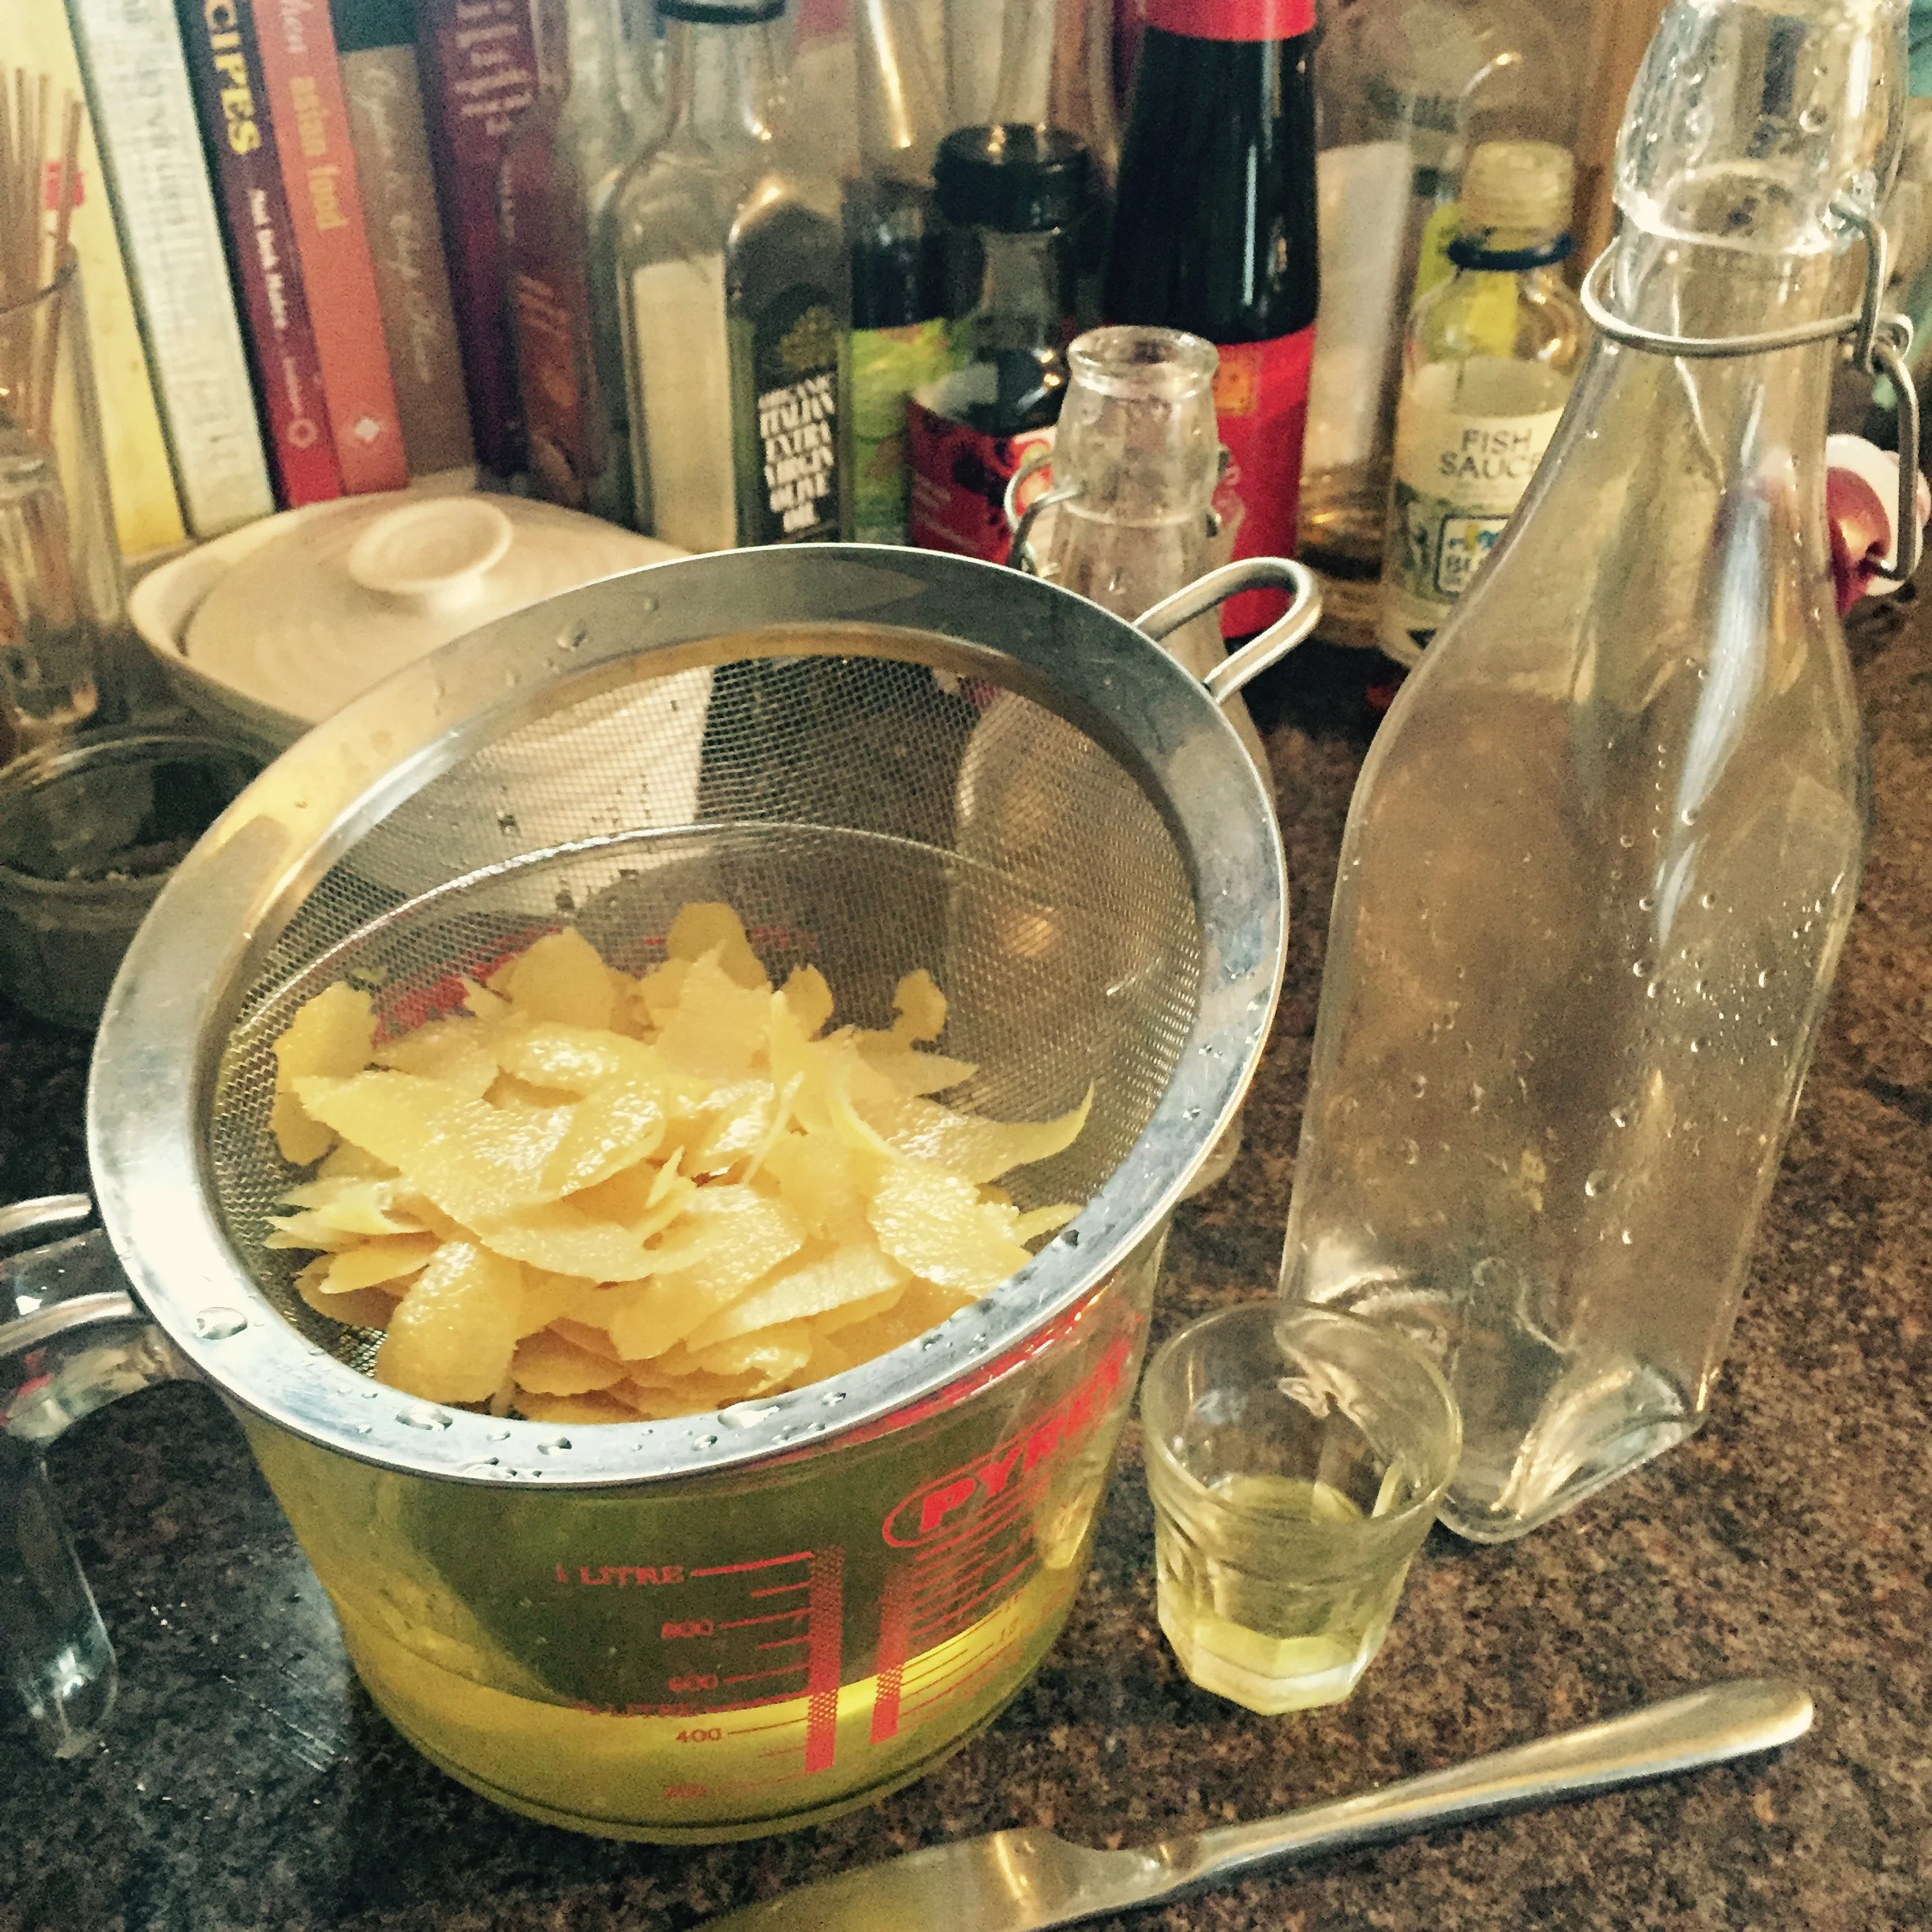
You strain the peel from your liqueur then add about half the quantity of sugar syrup and taste, and add more as necessary until it's the right sweetness for you.  Easy!

But what I did, was assume I had enough sugar syrup in the fridge as I'd made vodka sours this week for a supperclub.

Rachel Redlaw limoncello

There was nowhere near enough and my drink was horribly bitter.

And then, to make it even harder, I decided I couldn't be bothered to make up 'proper' sugar syrup, so I just put boiling water into half a cup of sugar and stirred til dissolved.  

 
Rachel Redlaw limoncello
 

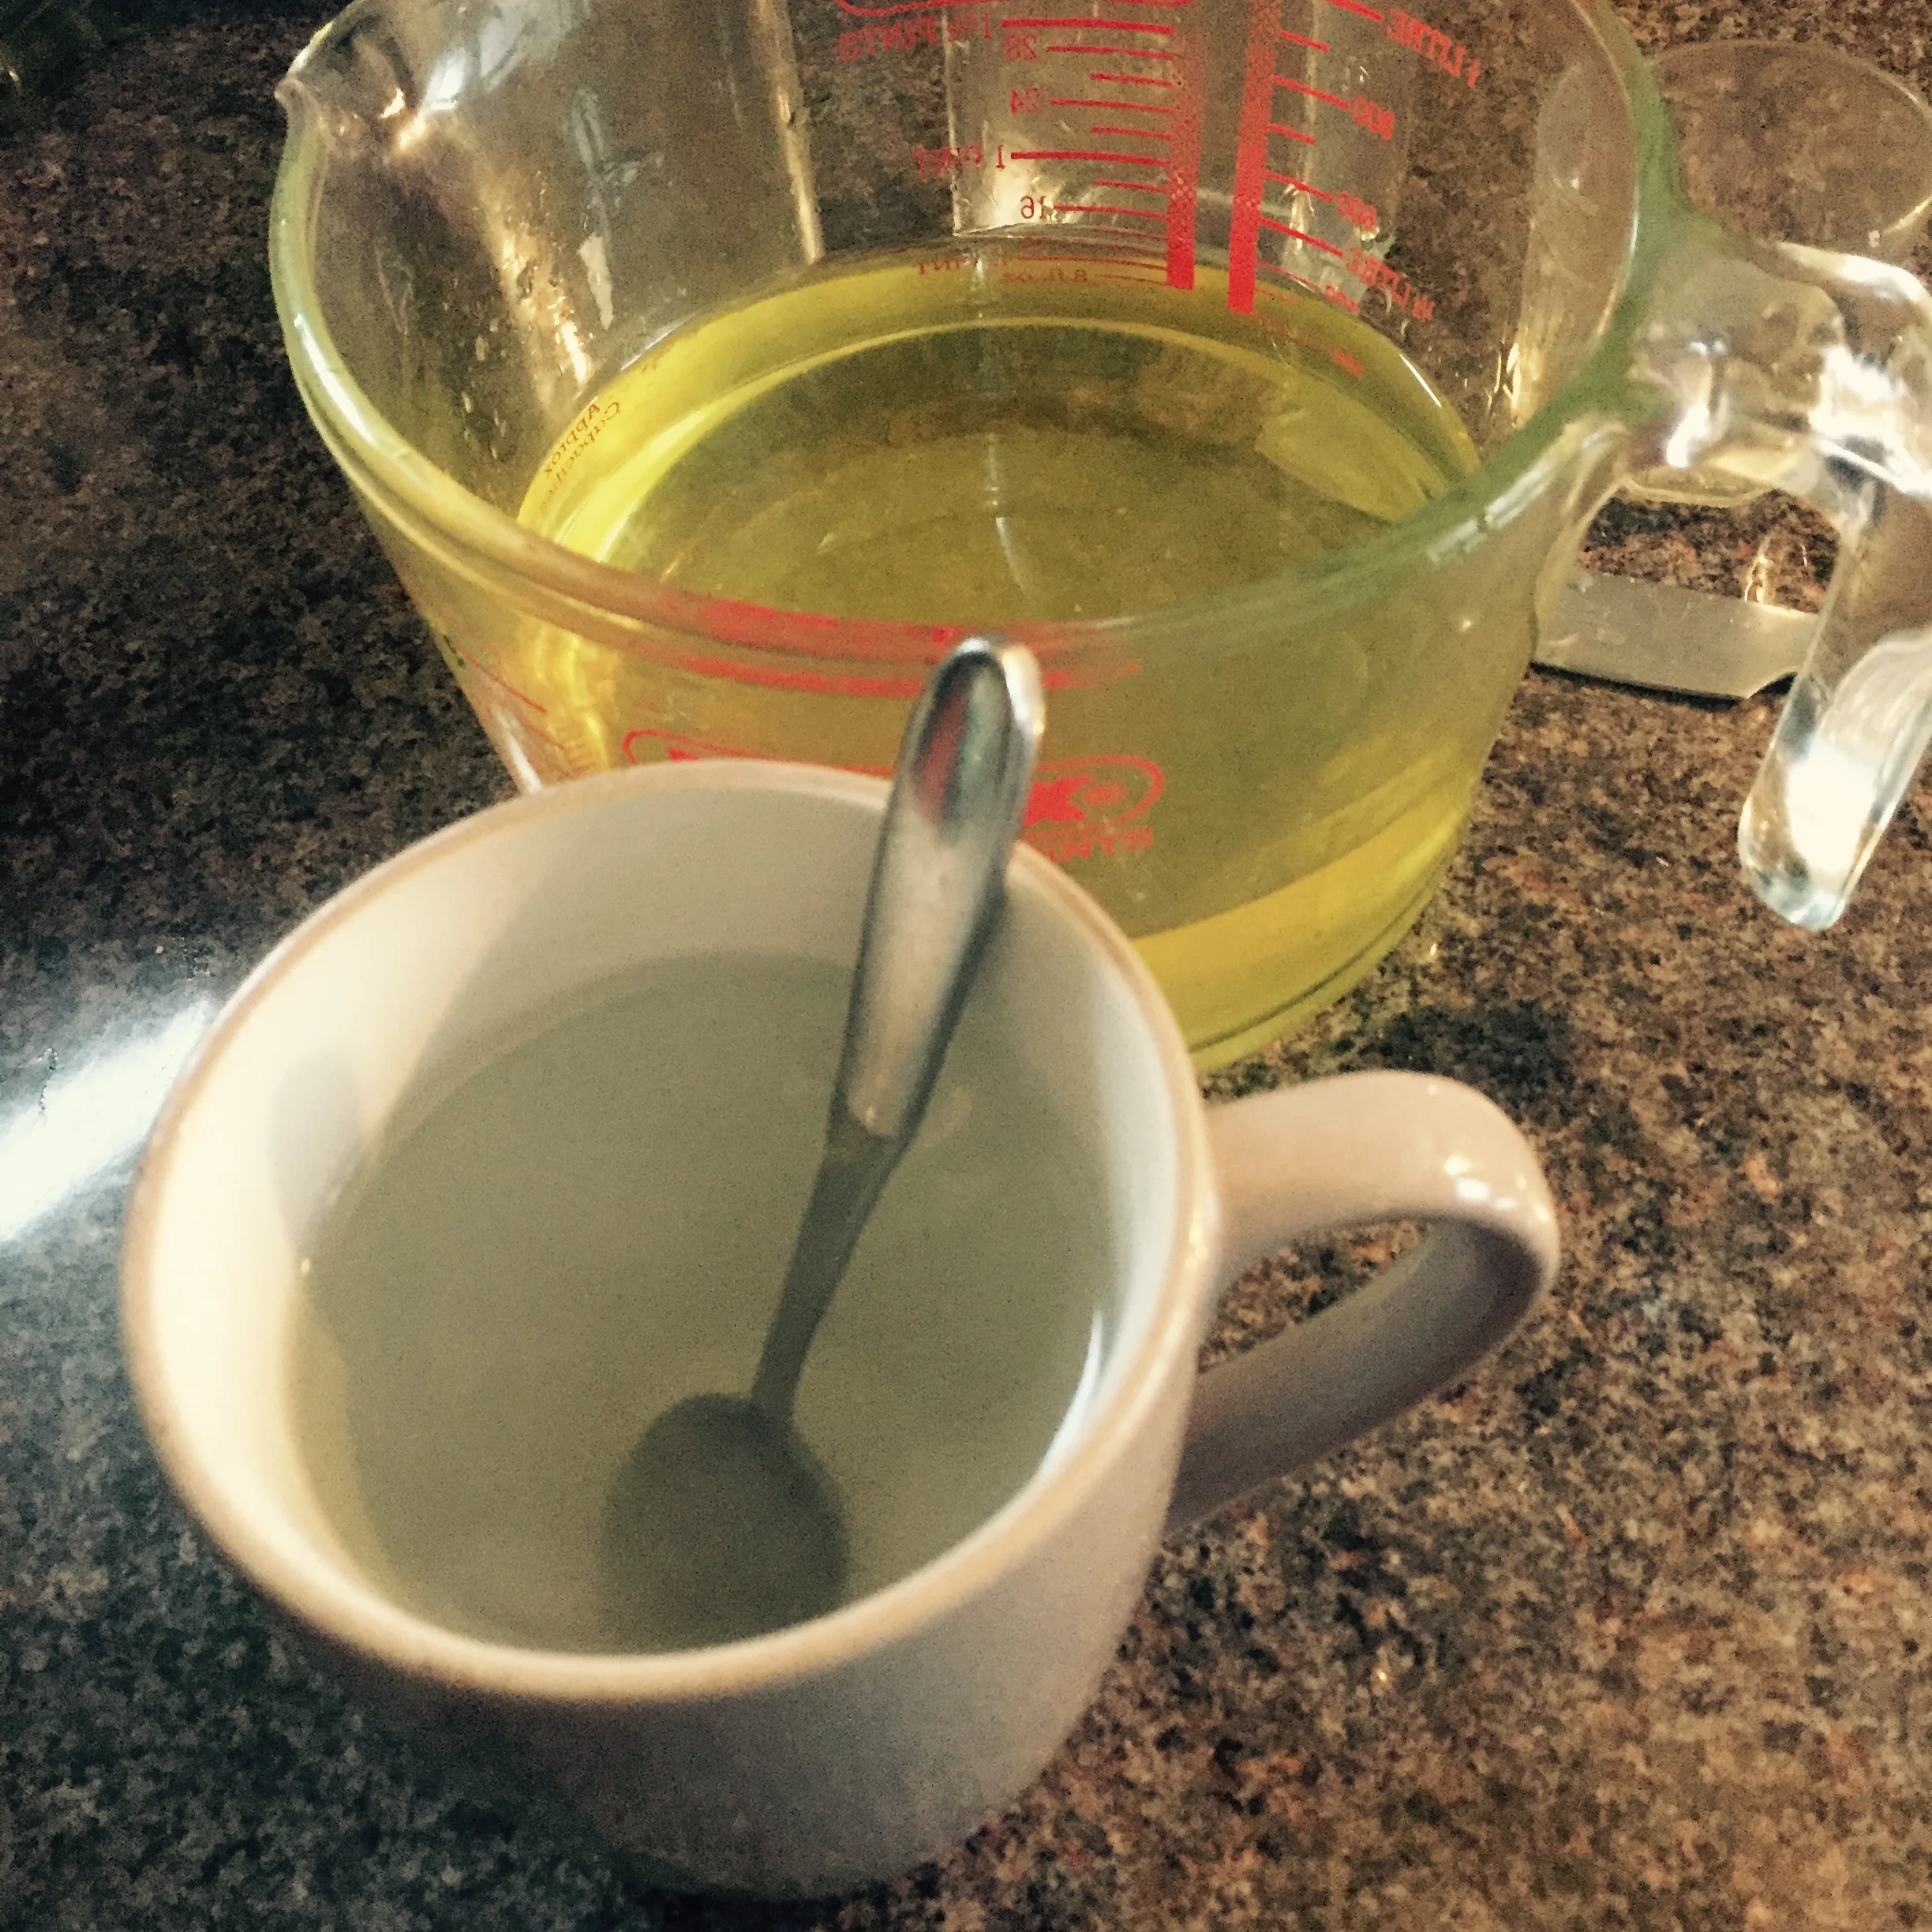
When cool, I added this to my lemon liqueur and ... it was still bitter.  So I made another cup of my 'cheat's syrup' and added half of it.  

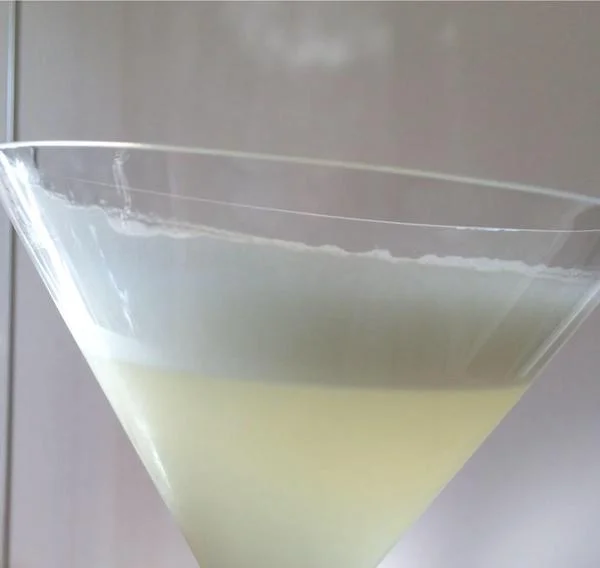
My limoncello tastes absolutely fine, despite all this messing around, if not the very best version I've ever made!

Leave it for 24 hours to settle and then keep in the fridge until needed.

 
Rachel Redlaw limoncello
 

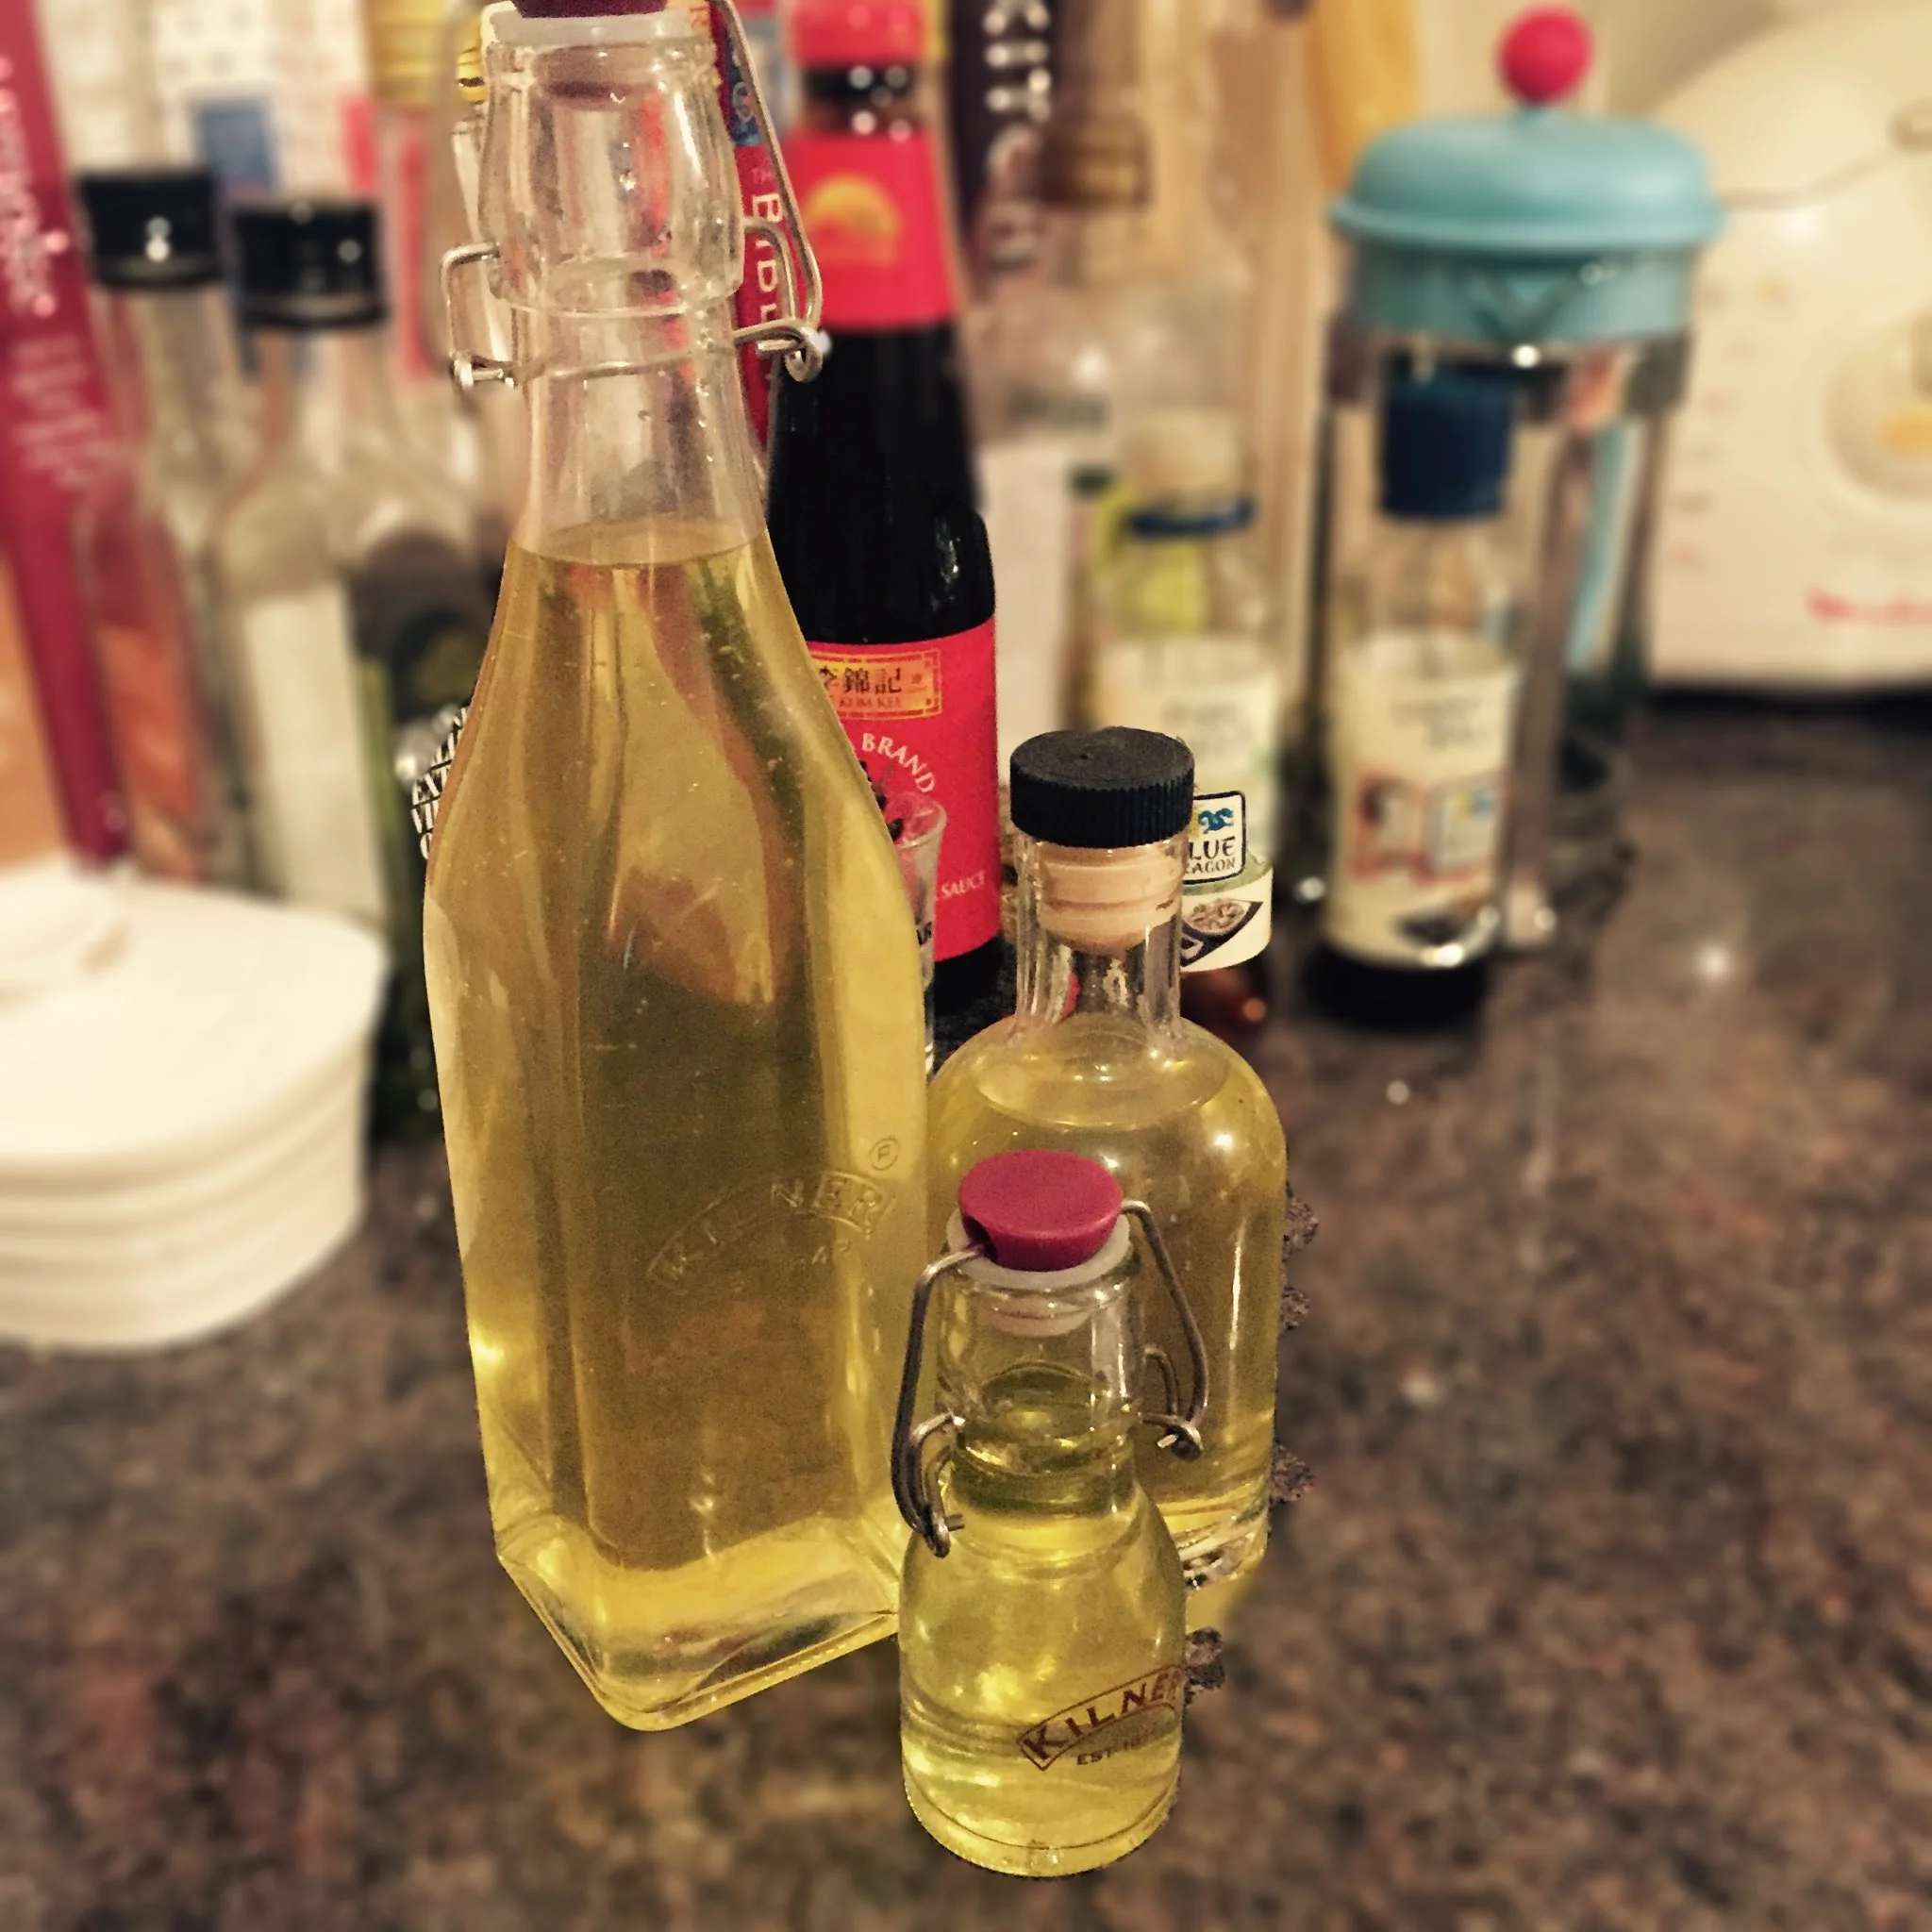
At least it looks pretty ... and I hope you make it the easy way, not the totally-round-the-houses-way and that you like it! 

Would love to see what you make - do share.


Chicken stir fry with chilli paste and Thai basil

So, first the chilli paste in oil, or nam prik pao.  If you like cooking Thai food, you may have a jar of this in the cupboard or fridge already.  

If you don't - and you fancy making it - I've a very simple version that's super-quick to make right here.

 
nam prik pao chilli paste in oil Rachel Redlaw
 

You can use the nam prik pao in a tom yum soup, or in this lovely squid stir fry.  It's also just a really versatile condiment and I just might have been known to scoop a little on cheese on toast or have with shepherd's pie too ... 

If you've got some nam prik pao, and you've made the rice to serve with this in advance, then you're basically ready to go - as this stir fry is quick to make.

For two, you'll need: 

cooking oil 

2 cloves of garlic, flattened and chopped

1 chicken breast, minced (in the food processor, or chopped as I prefer to do it)

1 heaped tablespoon chilli paste in oil (nam prik pao)

1 teaspoon fish sauce

some chopped veg (I had red and yellow peppers, a mushroom and a few spring onions)

a tablespoon or so of water

a big handful of Thai sweet basil leaves, or 1.5 teaspoons of jarred Thai basil

dried chilli flakes (to serve)

 
Nam prik pao stir fry chilli paste in oil Rachel Redlaw
 

Put your pan on a medium heat and when hot add a good slosh or two of oil and when that's hot add the garlic.

As for many Thai recipes, stir fry the garlic for perhaps up to 30 seconds over a medium heat, making sure it doesn't burn, until it 'smells good'. (Yep, that's the instruction on most recipes!).

Then add the chicken, nam prik pao and fish sauce and stir fry for a few minutes until the meat is nearly cooked. 

Add the chopped vegetables and a splash of water and stir, then add the jarred basil (if using jarred) and cook for another 4-5 minutes until done. 

 
Nam prik pao stir fry chilli paste in oil Rachel Redlaw
 

If using fresh basil add right at the end just before turning off the heat and stir in until wilted.

Serve with the rice and with a sprinkling of dried chilli flakes (if liked).

Nam prik pao stir fry chilli paste in oil Rachel Redlaw
Nam prik pao chilli paste in oil Rachel Redlaw

I really love this simple stir fry - I think it has unexpected depth from the nam prik pao.

What do you think?


Borneo coconut chicken curry

I have been SO looking forward to making this curry!

The recipe was given to me by Shaun Naen, a chef originally from Borneo.  It's a dish his mother taught him when he lived at home - and a special dish she would make for occasions such as a birthday or Chinese New Year. 

Since I left home, I miss my mother and her cooking very much. When I first cooked this it reminded me so much of home I felt quite overwhelmed’
— Shaun Naen

I made it today for the first time and it's going to be a special occasion dish in this house from now on too.

Because I wanted to make it as it should be I did cook the full amount (it only JUST squeezed into my biggest pan!) but it would be easy to scale down to make a smaller amount.

I love that it's a bit different in that you get a whole chicken piece in each portion rather than being it chopped up.  

It's also exactly the sort of dish I want people to share with me - there's something lovely and warm in having personal dishes shared - family favourites; dishes that mean something; food that has real memory and love behind it. 

So, let's go.  

Let's go make a great-big-celebration-special-occasion-for-all-the-family coconut chicken curry.

For eight people, you'll need:

Borneo coconut chicken curry Rachel Walder

1 white onion (or a few shallots)

2 inches of fresh ginger

5 cloves garlic

5 red chillies (I wasn't sure whether they were big mild ones of birds eye - so used four bigger ones and one birds eye chilli just 'because'.  So use what you like!)

4-5 tablespoons rapeseed/cooking oil

5 tablespoons hot curry powder

2 teaspoons ground coriander

2 teaspoons ground cumin

3 tablespoons ground turmeric

1 whole chicken, cut into eight (I got my butcher to do this as wasn't confident - but I'll try myself next time)

 
Borneo coconut chicken curry Rachel Walder
 

600 ml coconut milk

2 big potatoes, peeled and cut into chunky cubes, then blanched (cooked in boiling water for 2-3 minutes)

 
Borneo coconut chicken curry Rachel Walder
 

10 cardamom pods

2 cinnamon sticks or cassia bark

15 curry leaves (OK, now these I just couldn't find - so I used kaffir lime leaves plus a couple of bay leaves.  It's not quite correct, but it was still really good!)

4 star anis

2 lemongrass stalks, outer layer peeled off and then bruised

2 tablespoons garam masala

seasoning to taste

a big handful of coriander leaves, chopped

a few slices of red chilli, to garnish

cooked rice, to serve


Peel the onion and chop roughly into a few pieces.  Peel the ginger and chop into chunks.  Peel the garlic, and take the stalks off the ends of the chillies and cut in half. 

 
Borneo coconut chicken curry Rachel Walder
 

Put them all into the food processor and blitz to make a coarse paste.

 
mixed curry paste.jpg
 

Heat the oil in a wok (my wok wasn't big enough so I used my biggest pan and that was only just big enough!) ... and when hot add:

- the paste from the food processor

- curry powder, ground coriander, cumin and turmeric

Borneo coconut chicken curry Rachel Walder

... and fry for a little, stirring all the time.  

When it comes together (and smells amazing) add the chicken pieces and the coconut milk.

 
Borneo coconut chicken curry Rachel Walder
 

Stir and then add in the potato cubes.

Stir again and add the cardamom, cinnamon/cassia, curry leaves, star anis and lemongrass.

 
Borneo coconut chicken curry Rachel Walder
 

Simmer until the chicken is tender and cooked through - about half an hour. 

 
Borneo coconut chicken curry Rachel Walder
 

Then add the garam masala and a little water if needed.

Season well - I needed quite a bit of salt in mine and a pinch of black pepper.  Stir again and simmer for a couple of minutes more.

Serve with fresh chopped coriander and coconut rice or boiled rice.

Borneo coconut chicken curry Rachel Walder

PLEASE TRY THIS!

(And let me know what you think). 

Definitely a special occasion dish in this house now too. 


YOU MIGHT ALSO LIKE ... 

Sloe gin

I love this time of year.

Autumn. Fall.  Call it what you will.  

 
Rachel Walder autumn Fall sloe gin
 

Season of mists and mellow fruitfulness indeed (the photo is my local park this week). I love crisp mornings, sunny days and cosy evenings.

And I love making preserves, pickles and infusions that will see us through winter. 

It's the perfect time to go looking in the hedgerows for sloes - they're a bit early this year so now is probably about as late as you can leave it.  I'm lucky - my dad has sloes growing in the field and picked and sent me a box of them in the post ... 

So now's the time to the sloe gin started ready for Christmas.

If you make it now, it'll be good at Christmas. If you can wait, it'll be even better next year.  And even better the year after.

So simple to make - do give it a try if you can get hold of some sloes.

 
Rachel Walder sloe gin
 

All you need are the sloes, a bottle of gin and caster sugar.

First ... make yourself a G&T. Why not?

 
G&T.jpg
 

Then, using the point of a small knife, or a pin, prick each sloe a few times (unless it's so juicy it's already burst, as a few of mine have).

 
Rachel Walder sloe gin
 

Get a bottle or a jar to house the sloe gin until it's ready to strain and put into pretty bottles.  I used to have a huge jar that looked great, but have no idea where it's gone so today am using an old vodka bottle and a jar. 

Put in a layer of sloes and cover with a layer of caster sugar.

Keep layering until the bottle's full / the sloes are finished.

Rachel Walder sloe gin

Then pour in the gin, leaving time for it to bubble through the sloes and sugar before pouring in more.

Just leave in a cool-ish and dark-ish place until Christmas, turning and tipping every few days - or whenever you remember - so over the next few weeks the sugar completely dissolves.

Rachel Walder sloe gin

When it's ready, I'll be back here to change that header picture to the beautiful ruby-coloured finished product! 


YOU MIGHT ALSO LIKE ...

B's butter chicken masala

Last August, my whole family went to Devon for a week for my step-mum's 60th birthday celebrations.  And oh, it was so very beautiful. 

Devon sea.jpg

She rented the most gorgeous big house, called uh, The Big House, in Ilfracombe and it was idyllic.  We went on long walks and to the Tunnels beach and we ate and drank a lot and played games and cards after dinner every night.

 
Rachel Walder Devon
 

Each evening, we took it in turns to cook.  

And this year for my step-mum's birthday, I made her a photo book and cook book with all the recipes in it ... and now I can't seem to stop making my sister-in-law's butter chicken curry.

It's really simple and very, very good.  Last year I only got to eat the leftovers the day after she and my step-brother had cooked as I wasn't there the first two days (er, CARNIVAL!) but I'm really glad I got to try the leftovers (in fact it might even have been better the day after).

So I thought I'd share the recipe as I'm starting to feel it might be a butter chicken sort of Sunday evening tonight ... 

Here's what you need to serve four: 

1 tbsp of butter, ghee, or oil

2 onions, minced

1 tsp of minced ginger

1 tsp of minced garlic

2 tsp of coriander powder

1 tsp of chilli powder (use Kashmiri for best results)

1/4 tsp of turmeric powder

1-2 tsp salt (adjust to taste)

1 tomato, pureed

1 tbsp of tomato paste

1 large pinch of kasuri methi / dried fenugreek leaves (I didn't have these so left them out and it was still delicious)

1 cup of milk

250 gm of skinless, boneless chicken, cubed

1 tsp of garam masala or chicken masala

3 tbsp of cream or pureed cashew paste (soak and grind cashew nuts)

1 small bunch of coriander leaves, to garnish


Here's how you make it ... 

Heat the butter in a pan and add the minced onions and fry until golden brown

Add the ginger, garlic, coriander, chilli powder, turmeric, and salt. Fry for a minute until fragrant.

Add the pureed tomato and tomato paste and cook for 3-4 mins.

Throw in the dried fenugreek leaves, the milk and the cubed chicken.

Cook covered for 8-10 mins until the chicken is soft. The chicken will let out more water, so just check on it once or twice and give the curry a stir.

Keep it simmering gently.

When the chicken is cooked soft, open the lid and cook for a further minute or two. If the gravy is too thick, add some water at this stage.

When done, add the garam / chicken masala and the cream or cashew paste, and give it a good stir, but don’t let it boil.

 Adjust salt, garnish with the coriander leaves and serve with rice.  If you have any rice-cooking-fear - and lots of people do - here's my really easy and totally foolproof method

Do let me know if you make this curry - and what you think!

 
Rachel Walder Devon B's butter chicken masala


YOU MIGHT ALSO LIKE ... 

Fish Tacos (tiniest-thai-style)

I don't think I'd even ever heard of fish tacos until this year ... and then some of my online friends in the States were mentioning them - and my only thought was a bit 'ewww ... weird ... not sure about that at all!'. 

But I was kind of intrigued too and started mulling over this fish taco concept.  And then last week I caught the fish taco recipe part of a Jamie Oliver programme ... and ok, having seen them, I actually couldn't wait to try them myself. 

So I found the Jamie recipe (and his Everyday Super Food book is now on my birthday list) and today, dear reader, I made it.  Kind of.  

I used it as inspiration but because I had slightly different ingredients and I wanted to make it a little bit 'Tiniest Thai' I did change it around a bit. Of course I did! That's how I cook (and live). 

And I have to say, it's a great recipe and a totally delicious dish.

What I love is that it's really easy and that I can see how I can make it a bit different every time, now I know what I'm doing.

There's a few stages in making it so it does take a little time, but each stage is super-easy and then you just combine it all at the end. 

So this is how I made my fish tacos.  

It makes four tacos so up to you if you think this is enough for four people, or two or just one (yes it's that good I can see how this could happen!).

Get the ingredients together.

Rachel Walder fish tacos ingredients

I found the easiest way of putting the dough together was to just put it all in a measuring jug - the 60ml water, 100g plain flour (Jamie used wholemeal; I only had white) and a pinch of salt. 

Knead the dough for a minute or two and then set aside. 

 
Rachel Walder fish tacos dough
 

Then you need the ingredients for the salad part - Jamie uses red cabbage, coriander leaves, red wine vinegar and orange juice.  

I just used what I had and made a Thai-style dressing instead:

half a white onion, sliced finely 

one courgette, julienned (is it a verb?)

one carrot (julienned)

half a handful coriander leaves, chopped 

All scrunched up with a very scant tablespoon of fish sauce and the juice of half a lime. 

 
Rachel Walder fish tacos salad
 

Next I prepared the fish filling of:

half a red pepper and half a yellow pepper, diced into 1cm pieces

2 spring onions, chopped

1-2 little red chilles (Jamie's version doesn't use chillies)

2 pieces of sea bass, sliced into 2cm (ish) pieces.  (Jamie's recipe says haddock with the skin on, but I had sea bass in the freezer - I also took half the skin off as it was kind of peeling off when I cut the fish into pieces).

1 tablespoon light olive oil.

Put it all in a bowl and mix.

 
Rachel Walder fish tacos fish mix
 

Now for the delicious salsa bit!

Jamie's recipe used a couple of kiwi fruits but my local shop didn't have any - it did have mango which I thought would work well (and I was right!). 

2 kiwi fruits or around half a mango

1 green chilli, cut in half (de-seed if you like - Jamie does, I don't) 

Put into a frying pan and cook over a medium heat for 2-3 minutes, turning once or twice until it's slightly charred. 

Then put in a blender with a handful of coriander leaves and the juice of a lime and blend until smooth. 

Rachel Walder fish tacos mango
Rachel Walder fish tacos salsa

NOTE: this is absolutely delicious.

Even if you never make the fish tacos, do please, please make this salsa sauce. It's really really good and would be great with grilled fish, or meats, or honestly, just about anything. 

OK, now let's make some fish tacos ... 

You've got the salad made, the fish mixture ready, the salsa sauce done and the dough there to make tacos ... so let's start with the tacos themselves.

Take the dough, halve it and halve again so you have four small balls of dough and then roll them out until thin.

Put a non-stick pan over a medium heat and when hot, add a taco to the pan and cook for a minute or so each side until it starts to bubble. Remove to a plate and put in a very low oven or cover with a hot clean tea towel. 

Rachel Walder fish tacos dough
Rachel Walder fish tacos

This was my first time making tacos and whilst I could use a little practice, they were still ok and tasted good! 

When the tacos are cooked and left to keep warm, return the same pan to the heat and add the fish mixture.

Stir fry for around four minutes until cooked through. 

 
Rachel Walder fish tacos
 

Now it's time to build the tacos. 

Add the fish mixture, some salad, the incredible salsa sauce and a drizzle of natural yogurt. 

And that's it!

I topped them with a little coriander and added some lime wedges.

Rachel Walder fish tacos Thai style

Serve immediately and then just start planning how you're going to change up the recipe for the next time you make these. 

I'm absolutely certain there will be a next time too! 

Do let me know if you make these - and if you made any changes to the recipe ... 


YOU MIGHT ALSO LIKE  ... 

Roasted nectarines (or peaches)

A really nice but simple perfect-for-late-summer pudding - a lovely recipe one of my sisters shared with me last year.

Do make sure you use ripe fruit though as it just won't work if it's not ripe.

Serves 4

4 ripe nectarines or peaches
8 tablespoons white wine
100g caster sugar
double cream or Greek yogurt to serve

Heat the oven to 180/Gas 4

Halve and stone the fruit and arrange on a roasting tin or dish cut sides up.

Add the wine and sprinkle over the sugar.

Bake for 15 mins or a little longer - until it's bubbling and the fruit a little golden on the edges.

Serve with cream or yogurt (Greek yogurt is my favourite!)


YOU MIGHT ALSO LIKE ... 

Simplest jam

Saturday was hot, beautifully sun-bathingly hot.

And I really needed a good blast of Vit D and to take in some sun-goodness and re-charge those empty batteries so I loved it.

But the forecast was for rain on Sunday so I thought I'd better get blackberry-picking before the rain got to them.  And they are pretty much perfect right now and the bushes are full of berries although - as always (why is this?) - it feels that the most perfect ones are just out of reach.  

Returned home with scratched legs, sunburnt shoulders and a tub of lovely ripe blackberries. 

Rachel Walder simplest blackberry and apple jam

It was much too hot to even think about cooking yesterday - plus the sunshine and my roof were calling me back - so the blackberries oozed in the weighing scales overnight waiting for the rainy hours on Sunday before they were made into jam.

And this is the easiest jam recipe ever!

Use any fruit really - peaches, nectarines, plums, all berries, apples, and combinations of them all. I've heard that less ripe fruit sets better but to be honest I just use what there is when I notice there's fruit that needs picking.

First, put a saucer in the fridge as you want it cold for testing when the jam is set.

You'll also need to get your jam jars sterilised - either use them hot straight from the dishwasher for those who have dishwashers, or if you don't (like me), wash them in hot water and put in a very very low oven (I used Gas Mark 1) for about 15 minutes.

Then it's onto the jam making. 

Weigh the fruit and put it in a preserving pan or stainless steel saucepan with an equal quantity of sugar.  

Rachel Walder simplest blackberry and apple jam

I decided to add a couple of apples that I brought back from my dad's garden last weekend, but didn't then add any more sugar too - there's quite enough in there already I think!

Put the pan over a very low heat and heat gently, stirring now and then, until the sugar has dissolved. 

Rachel Walder simplest blackberry and apple jam

Turn up the heat and boil fairy rapidly, for 20-30 minutes.

Stir occasionally and also skim off some of the foam that appears at the start of the boiling time.

Rachel Walder simplest blackberry and apple jam

Test after 20 minutes by dropping a teaspoon of the boiling jam onto the saucer that you have in the fridge and after perhaps 30 seconds it will be setting and a sort of 'skin' wrinkle across the top of the jam blob. 

If it's not quite ready, put the saucer back in the fridge, continue boiling the jam and try again in a couple of minutes.

Rachel Walder simplest blackberry and apple jam

To be honest, I'm not all that good at judging this and often leave it just a little too long and it sets quite hard.  But it still tastes good.  This time I decided it was ready after 25 minutes. 

If you have any tips for getting this part right every time, I'd love to hear them so please comment and share! 

Pour the jam into the hot jars straight away - I transferred it to a pyrex measuring jug first but still managed to spill a little. 

 
Rachel Walder simplest blackberry and apple jam
 

One and three quarter jars filled, and a few hours later when it was cool, a slice of toast and jam to test of course (with a cup of tea - and I very very very rarely drink tea - it was nice). 

Rachel Walder simplest blackberry and apple jam


YOU MIGHT ALSO LIKE ... 


Stir fried chicken & broccoli w/ oyster sauce & sesame seeds

Oh, this is very nice!  And very simple. And good.

One of my sisters emailed me a recipe for 'broccoli in oyster sauce' yesterday and it looked great, so I tried it tonight - adding a few other things along the way - and very good it was too. 

I've a feeling it's going to become a new favourite.

It's also a great vegetarian dish, well, pescatarian, as it has oyster sauce.  Just leave the chicken out if you're pescatarian!

Many a time a reader of my recipes has laughed at my vague or slapdash-seeming approach to measurements.

And when I say 'reader', you know I mean 'friend', but I'm being polite (but you know who you are).

It's just really difficult with this sort of cooking - different soy or fish sauces have different strengths and one lime will have more juice than another.

Plus I think the best bit about cooking is using your own palate and what tastes good to you. 

This recipe is possibly - to date - the MOST vague and slapdash when it comes to quantities. 

You're really going to have to guess and guage and taste!

To be honest, it doesn't include any ingredients you have to be careful with and is pretty much guaranteed to taste pretty awesome no matter what you do.  

So do give it a go! 

You'll need: 

 
Rachel Walder recipes - chicken and broccoli in oyster sauce with sesame seeds
 

cooked rice, to serve, if wanted

broccoli, the long stemmed sort is nice, but any sort will do - quantity is however much you feel like eating of it

cooking oil - I like my coconut oil at the moment but any oil that cooks at a high temperature is good for stir frying so vegetable, grapeseed, rapeseed etc (NOT olive oil which cooks at a lower temperature and will burn)

1-2 garlic cloves, depending on size (and your taste!)

1 chilli, or quantity to your taste

a couple of spring onions

a piece of fresh ginger 

one small-ish chicken breast, or however much you'll want to eat

dark soy sauce

oyster sauce 


Cook the broccoli first so it's ready to stir fry by steaming or boiling for a few minutes.

 
Rachel Walder chicken and broccoli with oyster sauce
 

If you're cooking rice to serve with this then just pop a steamer over the top for the last 4-5 minutes - or you could just put the broccoli into the rice to boil with it for a few minutes of course (no need to over-complicate).

Remove from heat and keep warm until needed.

Then toast some sesame seeds (I'd say around a tablespoonful) in a dry pan for a few minutes, shaking all the time and again, when toasted, set aside until needed.

 
Rachel Walder chicken and broccoli with oyster sauce
 

Chop the garlic, chilli, spring onion - cut it on the diagonal for this dish so it looks nice - and ginger.  Cut the chicken into very small pieces so that it will cook quickly. 

Heat a wok or frying pan over a medium-high heat, add some oil and only when it's hot tip in the chopped garlic, chilli, spring onion, ginger and chicken - it should sizzle when it goes in.

Rachel Walder chicken and broccoli with oyster sauce

Keep stirring and turning until the chicken is sealed and if you need to turn it down a little to prevent the garlic burning, then do! If it looks like it's going to stick, add a tiny splash of water.

After a few minutes, when the chicken's cooked, add the broccoli.

Rachel Walder chicken and broccoli with oyster sauce

I think the long-stemmed broccoli very elegant but once I'd added it to the pan tonight, I decided to chop it up a bit to make it easier to eat! Up to you what you do. 

Cook for a minute, stirring, then add the soy and oyster sauces.  I used a scant tablespoon of each. 

 
Rachel Walder chicken and broccoli with oyster sauce
 

Stir and continue cooking for another minute. 

Then put the rice onto a plate, spoon the stir fry around and sprinkle everything with the toasted sesame seeds. 

Rachel Walder chicken and broccoli with oyster sauce

Very good indeed! Let me know what you thought.

Next time I might try half a teaspoon of toasted sesame oil right at the end too, just before it's removed from the heat ... 


YOU MIGHT ALSO LIKE ... 

Viktoria's paprika potatoes / paprikas krumpli

This is a sort-of-soup that's almost a stew.  It's simple and very tasty. Filling and good value.

I love potatoes so I really liked this! 

The recipe was shared with me by my friend Viktoria and she told me that during her childhood in Hungary it was traditional to eat two courses at main meals, usually starting with a soup - often a vegetable broth or sometimes something more substantial like this.

It's made with a Hungarian dried sausage not available over here, so Viktoria suggested using chorizo or - if you prefer fresh sausage - a Polish sausage that will be more readily available would be similar.

When I told another Hungarian friend that I was making this dish she said her family make it with frankfurters - I might try those next time I make it.  

I found that the chorizo was soft as it's added at the same time as the water - this is the correct texture but it was an unusual texture for my palate.  

When I make this again (and I will), I might try frying the sausage with the onion and see how that works. 

For two, I used:    

two potatoes, peeled and diced

one onion

cooking oil

about 1/2 tablespoon sweet paprika (Hungarian if you can get it, or spicy paprika if you prefer) 

a piece of dry sausage or frankfurter (just use however much you like!) 

a couple of bay leaves (I used dried but I'd like to try it with fresh too)

salt and black pepper

The Tiniest Thai Rachel Walder Viktoria's paprika potatoes

Peel, wash and dice the potatoes, and peel and chop the onion finely.

Heat a tablespoon or so of oil in a saucepan and saute the onion until soft. 

Add the paprika and mix in quickly as you don't want the paprika to burn and taste bitter.

 
The Tiniest Thai Rachel Walder Viktoria's paprika potatoes
 

Now tip in the diced potatoes, stir to mix and then add enough water to cover.

The Tiniest Thai Rachel Walder Viktoria's paprika potatoes

Slice and add the sausage plus a couple of bay leaves and a little salt and pepper (you can adjust to taste when it's cooked and do bear in mind that the sausage is quite salty.

The Tiniest Thai Rachel Walder Viktoria's paprika potatoes

Cook until potatoes are cooked, around 15 minutes.  I deliberately overcooked them a little as I'm with Viktoria on this one and prefer them quite soft in this sort of stew/soup. 

Add salt and pepper to taste, and serve!

So simple and really good. 

 
The Tiniest Thai Rachel Walder Viktoria's paprika potatoes
 

She also shared with me a traditional dish for the second course to follow the paprikas krumpli and as soon as I've made it, I'll add it here too.

In the meantime, let me know what you think of the paprika potatoes! 


WANT MORE LIKE THIS?


YOU MIGHT ALSO LIKE ... 


Valentina's Sicilian Orange Salad

This is a really good and easy salad, another family recipe from my friend Valentina, and a traditional Sicilian dish. 

I think this would probably make enough for 4-6 people depending what you served it with.  I halved the quantities for two and it was perfect with grilled tuna steaks and my favourite tomato and onion salad.

You'll need:

The Tiniest Thai Rachel Walder Sicilian orange salad

For the dressing -

4 tablepspoons extra vergin olive oil

the juice of 1/2 lemon juice

1 tablespoon chopped parsley

salt and pepper to season

For the salad -

4 oranges

2 fennel bulbs

approx 60g black olives

1/2 white onion

Make the dressing first by mixing all the dressing ingredients (olive oil, lemon juice, parsley, salt and pepper) in a bowl.

The Tiniest Thai Rachel Walder Sicilian orange salad

Even though I halved the salad quantities and the olive oil, I still put in this much lemon juice as I like it really lemon-y so do taste and adjust as you like. 

Set aside while you prepare the salad. 

Peel and segment the oranges, removing all pith then slice or halve as you prefer, but do cut them gently to try to keep the juice within the orange pieces rather than all over the bowl.

Slice the onion and fennel bulbs in very thin slices and add the olives.

Add the orange pieces and combine gently, then add the dressing and toss with clean hands so that everything is coated and thoroughly mixed.

The Tiniest Thai Rachel Walder Sicilian orange salad

It will keep in the fridge for a day or so, but is best eaten fresh.  It was deliciously summery with grilled tuna steaks and I'll be having it with steak soon too.

If you make this I'd love to know what you eat it with so do let me know in the comments below.


YOU MIGHT ALSO LIKE ...

Valentina's mushroom risotto

This is the best, most delicious risotto I've ever made, all thanks to my friend Valentina sharing her family recipe.  

When she talked me through how to make this, we also chatted about family, food and memories - if you'd like to know more then head over here

But if you 'just' want this gorgeous recipe, then here's what you need to make the most beautiful mushroom risotto for two.

 
The Tiniest Thai Rachel Walder mushroom risotto
 

half a 25g packet of dried porcini mushrooms, soaked in hot water for 20 minutes

extra virgin olive oil

1/4 onion, finely sliced

2 garlic cloves, chopped finely

a selection of mushrooms -  I used about 8 white and chestnut mushrooms 

1/4 onion

2 garlic cloves

salt

1 vegetable stock cube (I used chicken as I didn't have a veggie one) made into stock with 1 litre of boiling water

about 3/4 cup risotto rice

2 tablesppons grated fresh parmigiano cheese

3 teaspoons mushroom concentrate (optional)

1 tablespoon double cream 

salt and black pepper, to season

chopped fresh parsley to serve

Put the dried mushrooms in a bowl, cover with hot water and leave to soak for 20 minutes. 

Put a saucepan over a low heat, add some extra virgin olive oil and tip in the onion and garlic plus a pinch of salt.

 
The Tiniest Thai Rachel Walder mushroom risotto
 

Cook over a low heat for around ten minutes until soft or, as Valentina says, until 'it makes gold' (but not brown, you don't want them browned). 

In the meantime, chop the fresh mushrooms into small pieces.

When the onions and garlic are soft, add the mushrooms to the pan and continue cooking on a low heat, stirring every now and then. 

 
The Tiniest Thai Rachel Walder mushroom risotto
 

After the mushrooms have been cooking for around 10-15 minutes, add one ladle of the stock and stir in.

Now add the risotto rice - the rice will absorb the little water that comes from the mushrooms so you need to stir constantly for the first 30 seconds. 

 
The Tiniest Thai Rachel Walder mushroom risotto
 

Then slowly add another ladle of the stock and keep stirring so the rice doesn't burn.

Now strain the dried mushrooms, add and again, stir in.

All you need to do now is add a ladle of stock at a time and stir until it is absorbed.

 
The Tiniest Thai Rachel Walder mushroom risotto
 

Continue doing this until the rice is creamy and all the water absorbed.  You might not need the full litre of stock or you might need to add a little more water.  

It's going to take quite a while, perhaps 20 minutes, so you do just have to take it slowly, be patient and surrender to the whole long beautiful process of making a risotto. 

 
The Tiniest Thai Rachel Walder mushroom risotto
 

When the rice is creamy and just before you turn off the heat, add two tablespoons of grated Parmigiano cheese, three teaspoons of mushroom concentrate ( if you have it) and one tablespoon of double cream. 

Stir to combine, turn off the heat, season to taste and serve your risotto with a little chopped parsley. 

 
The Tiniest Thai Rachel Walder mushroom risotto
 

PS. I have a confession.  

I've made this twice now - both times I was home on my own and once I thought I'd leave a portion for the bf to have when he got home and the other time i thought I'd take the other half in to work for lunch the next day.  

On both occasions, full though I was, I ended up eating the (big) second portion that same night ... oops.

So beware! Only make this when you have all the people needed to finish it, or lots of willpower.

Because this is DELICIOUS.


YOU MIGHT ALSO LIKE ...

Yam ruam mit - hot sour salad with pork, prawns and squid

It's interesting, that zeitgeist-y sort of thing when you realise that everyone seems to be talking about the same thing.  

And right now, whether they're food editors, stylists, charity fundraisers, branding people or online entrepreneurs, it seems everyone is all about 'authenticity'.  Authentic voices, authentic people, authentic experiences, authentic you. 

I mean, I haven't tested this by asking all professions (note to self: must track down some lawyers, doctors and maybe politicians to get their views) but it's a collective seeping into the subconscious and I just love how these moments happen.  

It must be like when you name your baby a really original name and then realise four years later when they go to school that there's tons of 'em.  

Or for me, all the time, when I have a 'brand new' idea and blog it and realise EVERYONE's on the same tip. 

This also happened to me way back, back, back when ... at uni when I wrote my long essay for my degree. I can't remember it now properly but it was something to do with identifying English Romantic poets as part of a big philosophical movement 'taking in' German philosophers Kant and Hegel and the French existentialist movement.

For a week or so, I thought I was/were (yes, I actually wrote the dissertation for my language element on the use of the subjunctive) totally original and maybe even a genius.  Thank goodness this was before the internet was invented and it was so much easier to feel like a genius.

Anyway, I'm not sure I've ever gone so completely off topic in writing a recipe.  Oops. 

So ... segue-ing 'seamlessly' into my salad recipe, this salad is ALL about authenticity.  

And if you don't like very spicy hot and sour salads ('yam' actually means a 'hot and sour salad), don't make this.

The recipe is from a Thai cookery book, written in Thai, that a friend of mine who lived in Thailand for years and years and years, got in touch to tell me he'd found and ask if I'd like him to translate any recipes for me.  

Er, YES PLEASE! 

I made it for the first time this week for two friends who came to celebrate The Tiniest Thai's first birthday, and absolutely loved it.  

These are some of my favourite flavours and tastes, and it's really simple to make too.

Great served with rice to mop up the spicy, salty, sour dressing so do make the rice first so it's all ready to go.

Quantities are up to you really, so use more or less as you think will work best, but the recipe (enough for two with rice) is this:

The Tiniest Thai Rachel Walder yam ruam mit

50g prawns (shelled and de-veined)

100g squid (I don't know why I cut mine into rings as it would have been much nicer looking I think in tubes)

1/4 cup of Asian mushrooms (I couldn't find any in the supermarket so just used sliced button mushrooms)

50g diced pork (I used a piece of tenderloin and put it in the food processor to dice really finely)

1/4 cup shredded carrot (I just used a whole carrot rather than measuring it)

1/4 white onion sliced finely 

1 sliced tomato

1 stick sliced celery

1 sliced spring onion

4 tablespoons fresh squeezed lime juice 

3 tablespoons fish sauce

1 teaspoon caster sugar (or just normal white sugar if you don't have any)

4-7 birds eye chillies, squashed and crushed, so they can be removed easily rather than eaten if you prefer

Get all the ingredients together and then prepare and slice the seafood, meat and salad. 

The Tiniest Thai Rachel Walder yam ruam mit

By the way, I LOVE my julienne peeler that makes salads so easy!

Put all the vegetables into a bowl. 

Pan fry the diced pork in a little oil for a few minutes and then let cool slightly before mixing with the prawns, squid and mushrooms.

Put a pan of water on to boil and, when boiling, add the prawns, squid and mushrooms and boil for a minute or so until cooked. Drain and set aside.  Pan fry the diced pork in a little oil for a few minutes and then let cool slightly before mixing with the prawns, squid and mushrooms. 

Make the dressing by mixing the lime juice, fish sauce, sugar and chillies and stirring to dissolve the sugar.  

The Tiniest Thai Rachel Walder yam ruam mit

Mix the meat, fish and mushrooms with the vegetables, tip in the dressing and toss together to combine. You could also add cooked, cooled glass noodles now if you'd rather use noodles than having it with rice. 

The Tiniest Thai Rachel Walder yam ruam mit

This is going to be a summer favourite for me - do let me know if you try it and what you think! 

The Tiniest Thai Rachel Walder yam ruam mit


YOU MIGHT ALSO LIKE ...


Brunch invention - ruam mit gratiem/kao pad

There was rice left over from cooking dinner last night and I'd been planning a kao pad gai - fried rice with chicken - for brunch this morning.  I don't know why I'm saying it like this was an accident - I had deliberately made more rice last night than was needed just so that I could have kao pad today!

But I was also thinking about the ruam mit gratiem I'd made and thinking I'd like to make it again as I'm not that familiar with it yet and it was so easy and so good.

The conversation I had with myself went like this:

'Oh good! Favourite fried rice today!'

'But I kind of fancy making that stir fry again - I could try it with chicken this time.'

'If you make a stir fry though you're going to have to make more rice and there's already cold rice sitting there.'

'But I don't know which to choose - I want both!'

'Well then have both! Mix them together into one!'

So that's what I did.  I love cooking just for myself - I can experiment away and also make things as spicy as I like.  And that's generally pretty spicy.

Note that you do need cold cooked rice for this as freshly cooked hot rice is just too wet to stir fry.

The Tiniest Thai Rachel Walder brunch fried rice

Here's how to make my hybrid brunch dish.

Chop a piece of chicken breast into small pieces and also chop a nice big clove of garlic.

The Tiniest Thai Rachel Walder brunch fried rice

Get a pan hot, add some cooking oil and when hot tip in the chicken and garlic.

Cook over a medium heat - hot enough to seal the meat quickly but not so hot the garlic burns - for four or five minutes until the chicken is cooked.

Remove the chicken and garlic to a bowl, tip out any excess oil and return the pan to a medium low heat.

Quickly add:

2 x teaspoons oyster sauce

1 x teaspoon fish sauce

1 x teaspoon thin / light soy sauce

1 x teaspoon sugar

1 - 2 x teaspoons dried chilli flakes (I'd suggest just one - I put in two and it was a bit too much)

The Tiniest Thai Rachel Walder brunch fried rice

Stir for a few seconds until mixed and thick and bubbling.

The Tiniest Thai Rachel Walder brunch fried rice

Then return the chicken and garlic to the pan and mix with the sauce.

Add the cold leftover rice and cook for a few minutes on a medium heat, stirring all the time, until the rice is hot right through.

Push the mixture to one side, add a little oil into the space and when hot crack in an egg.

Leave to cook for around 15 seconds until scrambling and combining with the rice and chicken mixture.

The Tiniest Thai Rachel Walder brunch fried rice

Stir fry until everything is mixed and the egg cooked.

Remove from heat and prepare any garnishes you like - I'm using a shake of white pepper, some coriander leaves and a few slices of red chilli.

The Tiniest Thai Rachel Walder brunch fried rice

Turn out the rice and chicken mixture onto a plate, or pack into a plastic bowl first to make it look nice, and add a few slices of cucumber too if you have it.

The Tiniest Thai Rachel Walder brunch fried rice

A very good brunch and I'm glad I made it, but I do still prefer a 'proper' kao pad I think.

What do you think? Let me know if you try this - or any other variation of it.

And I'm off now to make more coffee :)

The Tiniest Thai Rachel Walder brunch fried rice


YOU MIGHT ALSO LIKE  ...

Tiniest-Thai-tradition: lemon vodka sours

Let's kick off the weekend with a cocktail!  These vodka sours aren't Thai at all but they do go exceptionally well with these lovely spicy cashews  - plus they're just delicious and very very simple.

You'll need a blender and you do need to make a sugar syrup first but do not be put off please!  

The sugar syrup is super easy to make and it'll keep in the fridge for a few weeks.

Make the sugar syrup in advance as it needs to be completely cooled down - just put one cup of sugar and one cup of water into a saucepan and bring to the boil on the lowest heat possible.  Then boil for three or four minutes, remove from the heat, cool then bottle or put into a jar and store in the fridge.

To make vodka sours for two you just tip into a blender:

A handful of ice cubes

Four shots of vodka

Two shots of freshly squeezed lemon juice

One shot of sugar syrup

One egg white

Then blend! Blend until the ice is totally crushed and everything is frothy and delicious. Then serve with a strip of lemon zest if liked - it just adds a bit of interest as otherwise the drink is very white looking.

Simple and absolutely my favourite drink (of the moment).

 
The Tiniest Thai Rachel Walder vodka sours
 

Let me know if you like them too!


YOU MIGHT ALSO LIKE ...

Noodle salad

Noodle salad.  Well, that's a bland-sounding title for a very lovely dish!  I made it because I had bought a bag of bean sprouts to make a pad Thai but then didn't have the energy on a hot evening to give it the love and attention that pad Thai needs.

So I needed to make something else with bean sprouts and decided on a noodle salad.  It's a deliberately vague name as it's much more about the component parts than a specific recipe - whatever you have in the fridge there'll be a version of noodle salad you can make.

The noodle bit 

In my head I had glass noodles, but in the cupboard there were vermicelli rice noodles. Whatever noodles you have will be fine, so just cook them first according to the packet directions.  For these thin rice noodles I put them into a pan of boiling water, turned off the heat and let them sit for five minutes.  Then drained them, rinsed with cold water and left them.  As long as they have at least five minutes resting they're good to use.

The dressing bit

This makes enough for a two-person portion.  One tablespoon of fish sauce:

The Tiniest Thai Rachel Walder noodle salad

The juice of one and a half limes (or to taste, it needs to be more sour than salty).

The Tiniest Thai Rachel Walder noodle salad

And a teaspoon of sugar, then stir to dissolve.

The salad bit

Start putting salad things into a bowl. Anything really - cucumber, mushrooms, peppers, lettuce all good but I had some baby spinach, roughly torn, and a chopped tomato …

The Tiniest Thai Rachel Walder noodle salad

Some bean sprouts and carrots …

The Tiniest Thai Rachel Walder noodle salad

And chopped fresh herbs - I had mint and coriander.

The Tiniest Thai Rachel Walder noodle salad

The onion bit

Spring onions, shallots or red onion are all good …

The Tiniest Thai Rachel Walder noodle salad

The crunchy bit

I've used some crushed peanuts, but toasted and chopped cashews would be good or perhaps some toasted sesame seeds. Roasted rice powder would be good to add too, but I didn't have any.

The Tiniest Thai Rachel Walder noodle salad

The meat or seafood bit 

Put a pan on to heat, add oil and when hot add a couple of cloves of chopped garlic and one or two chopped birds eye chillies.

When fragrant, add any meat or seafood you like and stir fry until cooked.  I've got defrosted prawns and squid (I've always got packets of frozen seafood in the freezer!).

The Tiniest Thai Rachel Walder noodle salad

Once cooked allow to cool a little before … or you could just use cooked cold meat.

The assembly bit

Add the noodles to the bowl.

The Tiniest Thai Rachel Walder noodle salad

Then the meat or seafood … I needed to transfer it to a bigger bowl at this point!

Pour over the dressing and stir and toss (use your [clean] hands - it's easiest) until it's all mixed in.

The Tiniest Thai Rachel Walder noodle salad

The eating bit

Tip it onto a serving dish or plate, and … EAT!

The Tiniest Thai Rachel Walder noodle salad


LIKE THIS? YOU MIGHT WANT TO TRY THESE ...

Island-style bacon and eggs

 'But bacon and eggs isn't Thai food!'

I hear you.

But, done like this, it is for me.  It's what I call 'island-style' bacon and eggs and reminds me of eating in the sunshine, sitting on the sand at a low table and the sea right in front. Eating from a patterned plastic plate and mismatched cutlery.  It's probably not served where I had it any more now the beach bungalows have given way to villas and hotels with swimming pools, but I bet there are still some places in the world that do a great, garlicky, fried breakfast on the beach.

Anyway, it doesn't really need a recipe but here's how I put it together.  You'll need:

The Tiniest Thai Rachel Walder bacon and eggs

cooking oil

some slices of white onion

a couple of cloves of garlic, flattened and chopped (if you have the little Thai garlic cloves, just leave the papery skins on too to crisp up when fried)

chopped bacon (I'm using up some lardons)

cooked and sliced boiled potatoes (great for using up leftovers)

salt and pepper

one egg

Put a frying pan onto a medium-high heat, add the oil and when hot add the onion, garlic and bacon.  I cook all of this at a higher temperature than I would if I was making just normal bacon and eggs to try and recreate that sense of a full English being cooked too quickly over a high heat in a wok. Sort of like a stir fry full English!

Keep stirring though so it doesn't burn.

The Tiniest Thai Rachel Walder bacon and eggs

When the bacon's cooked, add the sliced cooked potatoes, turn the heat down a bit and leave to cook for a couple of minutes.

The Tiniest Thai Rachel Walder bacon and eggs

Turn the heat up again, add salt and pepper to taste, and cook for another minute or two, stirring, until the potatoes are hot right through.

The Tiniest Thai Rachel Walder bacon and eggs

Then either push everything to one side, add more oil if needed and fry the egg in the same pan …

The Tiniest Thai Rachel Walder bacon and eggs

…. or tip the bacon, potatoes, onions etc into a bowl and put a plate or lid on top to keep warm.

Then add more oil to the same pan and fry the egg over a higher heat than you normally might.

Keep spooning the hot oil over it as it cooks to cook it more quickly, and as soon as it starts to set, pop a lid on top and cook for perhaps two minutes.  The hotter temperature cooks the egg with a few bubbles in it and with just-about-to-crisp edges but you still want a lovely runny yolk.

The Tiniest Thai Rachel Walder bacon and eggs

Serve the egg on top of the pile of bacon, onions and potatoes and if you like, on a plastic plate as I did, for added 'authenticity'.

And there you have it. Drumroll please!  Island-style bacon and eggs.

The Tiniest Thai Rachel Walder bacon and eggs


LIKE THIS?  YOU MIGHT WANT TO TRY THESE ...

Pasta with lemon

Super-easy, super-quick lemon sauce for pasta and fittingly for today, a sunny day in June, it is sunshine on a plate. Best with long thin pasta like tagliatelle, spaghetti or linguine - but I make it with penne sometimes too.

A good lunch or easy supper, this goes well with a quick salad and it's also easy to add prawns or grilled chicken to make it more substantial. And lemon linguine alone makes an elegant first course.

My favourite sort-of-French-dressing uses:

3 tablespoons olive oil

4 tablespoons white vinegar

1 garlic clove, skinned and squashed (not chopped)

1 teaspoon Dijon mustard

Method (if you can call it that!) - put it all in a jar and shake, and add more of any dressing ingredient as needed to balance and until you're happy.

I put the jar into the fridge after using and every day just add more vinegar and/or oil as it gets more and more garlicky ...

The Tiniest Thai Rachel Walder lemon pasta

The original recipe for the pasta with lemon is from Mireille Guiliano's 'French Women Don't Get Fat' and while her recipe serves four, this has been modified and serves two.

if adding prawns, I find it easiest to throw them in with the pasta for the last minute or two to heat or cook.

The Tiniest Thai Rachel Walder lemon pasta

Make the sauce during the last few minutes of your pasta cooking, or when it's cooked, as it's very quick.

You'll need:

2 lemons

a good slosh of olive oil

around 100g-150g creme fraiche

approx 60g Parmesan

salt and pepper

The Tiniest Thai Rachel Walder lemon pasta

Grate the zest of the lemons and halve one of them so you have it ready to squeeze into the sauce and grate the cheese.

The Tiniest Thai Rachel Walder lemon pasta

In a saucepan, warm the olive oil and add the zest. Cook over a low heat for a couple of minutes.

The Tiniest Thai Rachel Walder lemon pasta

Add the creme fraiche and bring to the boil, then squeeze in the juice of one lemon and bring to the boil again.

The easiest way to juice a lemon is to squeeze a half over your closed hand so your fingers catch the pips.

The Tiniest Thai Rachel Walder lemon pasta

Cook for a couple of minutes, then add the grated Parmesan, season to taste and cook for another minute.

The Tiniest Thai Rachel Walder lemon pasta

Combine with the cooked pasta and serve immediately.

The Tiniest Thai Rachel Walder lemon pasta

Yep, sunshine on a plate and super-quick too :)


YOU MIGHT ALSO LIKE ...

Stir fried chicken or beef with cashews

So, my beautiful Big Niece has come to stay for a night - just overnight to break the journey to Cornwall. I wanted to get a picture of us together cooking dinner but there's just us here so it had to be a selfie.

And despite trying approx 6,742 times to get a shot we were actually both in, we only managed ones with one of us cut out or that were just too terrible to post. Here's the best of a very bad bunch of us looking blurry and 'super-excited' to be cooking this lovely stir fry (or maybe not!).

The Tiniest Thai Rachel Walder stir fry with cashews

Anyway, photography distraction over. We're making a chicken stir fry with cashews that I always think of as quite a special dish - a rich sauce, crunchy nuts, soft chicken and a bit of heat from the fried whole dried chillies.

I wanted the bigger dried red chillies ideally but only had the small ones and to be honest I used too many - next time I make this I'll use fewer (the right quantity is listed in the ingredients but the pic shows too many).  I think the big ones might be a little milder and I would have chopped them into smaller pieces after frying. The chilli issue is up to you though - use as few or as many as you like of course.

The quantity we made serves 2-4 people depending on, well, everything - hunger, greed, what else you're eating with it, etc so just adjust quantities as you wish and do taste and taste before and during adding the seasonings.

If you're serving with rice make that first and keep warm until ready.

Enough for us two as well as a portion leftover we used ...

1/2 a white onion

2 spring onions

2 cloves of garlic

2 chicken breasts

1 fresh red chilli to garnish, if using

vegetable oil, for frying

about half a cup of plain cashew nuts (not roasted or salted)

4-5 whole dried chillies (or to your taste)

1 tablespoon fish sauce

1 tablespoon dark soy sauce

1 teaspoon sugar

a good glug of oyster sauce

1 teaspoon sesame oil

a shake of white pepper

boiled or steamed rice, to serve

The Tiniest Thai Rachel Walder stir fry with cashews

Prepare the ingredients: chop the onion into smallish chunks rather than dicing finely; slice the spring onions using as much of the green stalks as you can; mince the garlic; cut the chicken into slices; and slice the fresh red chilli if using.

The Tiniest Thai Rachel Walder stir fry with cashews

Put quite a bit of oil, about 4 tablespoons, into a frying pan or wok and when hot add the cashew nuts.  Fry, stirring, over a medium heat until golden brown - this will take a few minutes. When brown remove from the oil, drain on kitchen paper and set aside.

The Tiniest Thai Rachel Walder stir fry with cashews

Return the pan to the heat and add the dried chillies to the hot oil and cook for around 30-60 seconds until they turn dark and crispy. Again, remove from the pan, drain on kitchen paper and set aside. If using big whole chillies, cut them into smaller pieces or crumble them with your fingers when cool.

The Tiniest Thai Rachel Walder stir fry with cashews

Drain off some of the oil if necessary so around 2 tablespoons remain, let cool very slightly and then return to the heat and add the garlic, stirring straight away so it doesn't burn.

After perhaps half a minute - but sooner if the garlic is turning colour - add the chicken and keep stirring, first to seal quickly and then to cook through. This will probably take 4-5 minutes.

The Tiniest Thai Rachel Walder stir fry with cashews

Add the onions, cashews and chillies and stir fry for a couple of minutes until the onions are translucent but still with a bite to them.

The Tiniest Thai Rachel Walder stir fry with cashews

Add the fish sauce, soy sauce, sugar, oyster sauce and spring onions and cook, stirring, for another minute or two.

The Tiniest Thai Rachel Walder stir fry with cashews

Add the sesame oil and a shake of white pepper, stir in and remove from the heat.

Serve topped with slices of fresh red chilli if liked and with plain rice.

The Tiniest Thai Rachel Walder stir fry with cashews

This is very good with beef too as the sauce is lovely and rich - but it needs cooking slightly differently as the beef doesn't take long to cook. Slice the steak into thin slices and dredge with approx half a tablespoon of plain/all purpose flour.

The Tiniest Thai Rachel Walder stir fry with cashews

Then after cooking the cashew and the dried chillies fry the beef in the same hot oil and again drain on kitchen paper.

The Tiniest Thai Rachel Walder stir fry with cashews

Cook the garlic, then the onions (I used red as didn't have white) and I added some red pepper too.  Then add the beef along with the cooked dried chillies, cashews, seasoning sauces and spring onion.

I think I actually prefer the beef to the chicken version but both are very good.

This is a really nice easy special dinner.  Let me know what you think ....

 
The Tiniest Thai Rachel Walder stir fry with cashews
 

YOU MIGHT ALSO LIKE ...

Pad krapow gai - spicy stir fried chicken with Thai basil

This is my favourite food of all time, my I-could-eat-this-every-day, my oh-I-did-eat-it-everyday-for-about-a-year food - and I still eat it around once a week. It's a perfect breakfast, especially in bright hot sunshine with an iced coffee, it's great with a kai dow (fried egg) on top of the rice. It's good with prawns, pork or squid but I like it best with chicken. There isn't an occasion it doesn't suit, and it cures headaches, hangovers and heartbreak too. Honestly!

It might not be my last-supper dish but I'm not sure ... contenders on that list wouldn't pass the could-I-eat-it-every-day criteria for favourite food.  What's your favourite food? What's your last supper food? My last supper could be a seafood platter or perhaps rack of lamb, dauphinoise potatoes and a green salad with mustardy dressing. Or a pad krapow.  Anyway ...

There's just one admission to make .... and that's that I'm not actually cooking a pad krapow at all.

There are two types of basil used in Thailand, both different to our Mediterranean basil. Thai sweet basil, horapha, is a bit aniseed-y and is used in Thai curries and - I learnt today from the ladies at Tawana supermarket  - can be used in a pad keemao (drunken noodles) where I  thought you could only use krapow.

Ah, krapowKrapow is the other Thai basil, holy basil, and it gives this dish it's name - literally 'stir fried with holy basil'. It's really peppery and unique. It's also really hard to grow in our climate and it's even hard for the Thai supermarkets to get hold of.

I really wanted my favourite food today so I went to one of my favourite places, Tawana supermarket on Chepstow Road, W2. It's a total treasure trove of delights plus I get to practice my Thai as well. And it soothes the soul.  Here's just a selection of the treats in store ...

The Tiniest Thai Rachel Walder Tawana supermarket

And here's the goodies I brought home ... including packets of holy basil seasoning I'll use for another, lazy, day.

The Tiniest Thai Rachel Walder Tawana supermarket

But the sad news is they had no krapow. Again. So I bought horapha and therefore what I'm actually cooking is pad horapha gai. It is still so good.  If you can get krapow then do! If you can't but you can get horapha, great! And it you can get neither, just make it without. Without is how I have it most weeks (pad krapow sans krapow) and still I love it.

It's a really spicy dish but you bash the chillies into pieces big enough to flavour the dish but not to eat unless you want to.  When I was taught to make this it was with the chicken alone - I've added the chopped pepper and mushrooms so do add veg or not as you wish.

Here's how I'm making my favourite dish ever tonight. Cook your rice first and then assemble the ingredients - as always, it cooks quickly.

Vegetable oil

Half to one chicken breast

Approx 6-10 small chillies (depending on size and how spicy you like it)

Approx four garlic cloves (or eight if you have small Thai garlic cloves)

Sliced red pepper and mushroom, or other sliced veg, if using

1/2 knorr chicken stock cube

Thick soy bean sauce or rich soy sauce

Oyster sauce

A good pinch of sugar

A handful of holy basil or sweet basil leaves, if using

The Tiniest Thai Rachel Walder pad krapow gai

Tear the basil leaves from the stalks, if using, and discard the stalks, and chop the vegetables into small pieces, if using.  Mince the chicken breast by chopping very very finely, as small as you can. I know some restaurants serve this dish with the meat in bite-sized pieces but I much prefer it minced as I was shown.

The Tiniest Thai Rachel Walder pad krapow gai

Peel the garlic - the quickest way is to squash the garlic with the flat side of a knife - and remove the stalks from the chillies and then place in a plastic sandwich / freezer bag.

The Tiniest Thai Rachel Walder pad krapow gai

Bash with a rolling pin until the chillies and garlic are all in small-ish pieces. If the bag splits don't worry just fold it and keep bashing!

The Tiniest Thai Rachel Walder pad krapow gai

Now put a frying pan or wok over a medium heat and when hot add a good glug of cooking oil. When hot add the chicken, and stir. When starting to seal tip in the garlic and chillies and cook until the chicken is completely sealed.

The Tiniest Thai Rachel Walder pad krapow gai

Add the vegetables if using and stir fry for another couple of minutes.

The Tiniest Thai Rachel Walder pad krapow gai

Add a splash of water, crumble in half a stock cube, a good dash of bean/soy sauce and a couple of dashes of oyster sauce plus a good pinch of sugar and stir it all in.  Here's a pic because I forgot to include the oyster sauce at the start.

The Tiniest Thai Rachel Walder pad krapow gai

Cook for another couple of minutes then throw in the basil and remove from the heat immediately.

The Tiniest Thai Rachel Walder pad krapow gai

Stir in the basil until it wilts and serve with the rice. Best dinner ever. Do you agree?

 
The Tiniest Thai Rachel Walder pad krapow gai
 

PS. Yes, I did make a huge portion. I love it!

PPS.  If you like pad krapow, you'll also like pad keemao  … give it a try :)


YOU MIGHT ALSO LIKE ...